Importing Data into Crisisworks
The Crisisworks import facility allows you to bulk insert new records and update existing records by uploading an import file.
On this Page
Importing Data
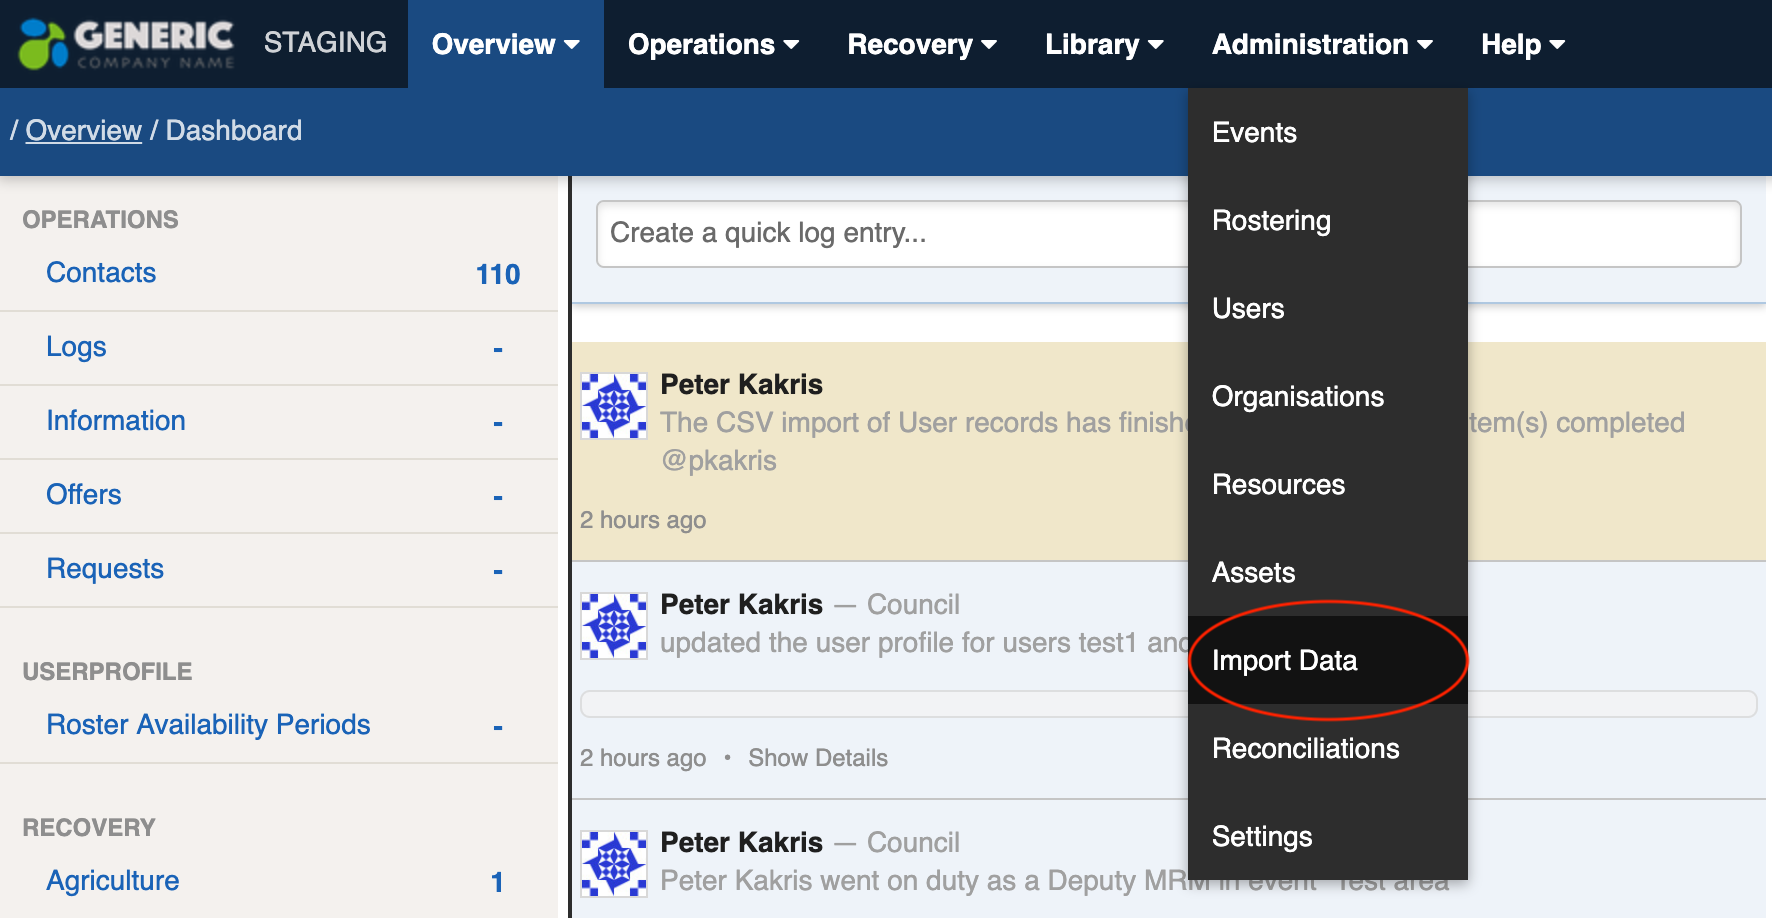
You can import data into Crisisworks by going to the Administration menu. You will see an option in this menu called "Import Data".
Supported Import Types:
Currently the import facility supports the importing of:
- Users (visit this page for specific information on importing Users)
- Contacts (visit this page for specific information on importing Contacts)
- Availability Data (Visit this page for specific information on importing availability data for Rostering)
- Assets (visit this page for specific information on importing Assets)
- Asset Contacts (visit this page for specific information on importing Asset Contacts)
- Case Applicants and Affected People (Recovery Contacts) (visit this page for specific information)
- Library Items - Documents and Geospatial features (visit this page for specific information on Library Imports)
- Recovery Cases (visit this page for specific information on Recovery Case imports)
- Resources (visit this page for specific information on Resource imports)
- FRV Initial Impact Assessment Data (visit this page for specific information)
- Infrastructure Assessments
- Recovery Tasks
- Fire Prevention Notices
- Weed & Pest Assessments
Please note: imports cannot be undone once they are imported. However, you can specify an optional tag to add to each record so you can identify all imported records from the batch.
There is also a rollback feature which will not save any records if any errors are encountered.
The Import Form
As of July 2019, the import form is broken up into 2 screens.
Page 1 of import process
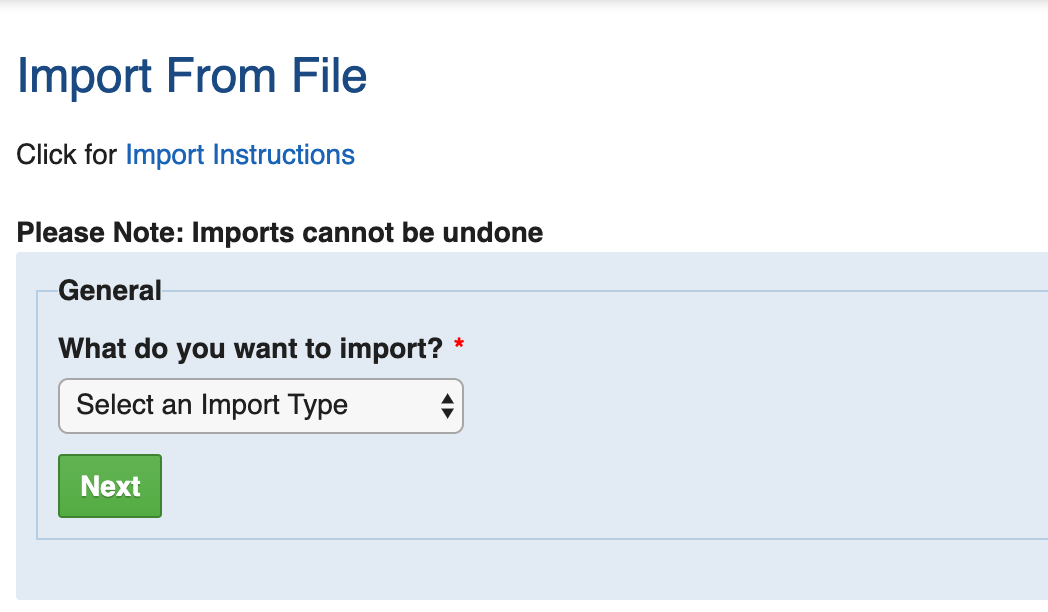
The first page allows you to choose what type of records you are wanting to import. Once you make a selection, the second page will only show available imports for that type of import.
Select the type of records you want to import from the drop down list and click on the green Next button.
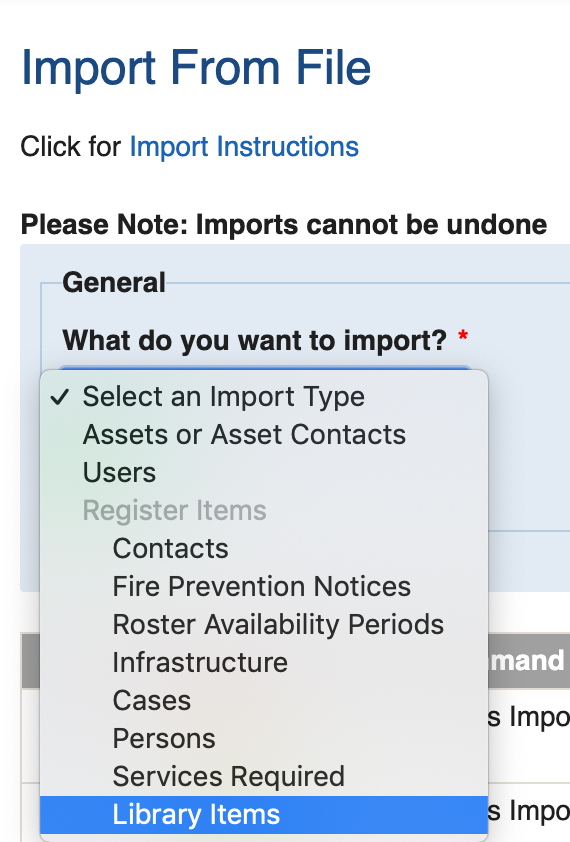
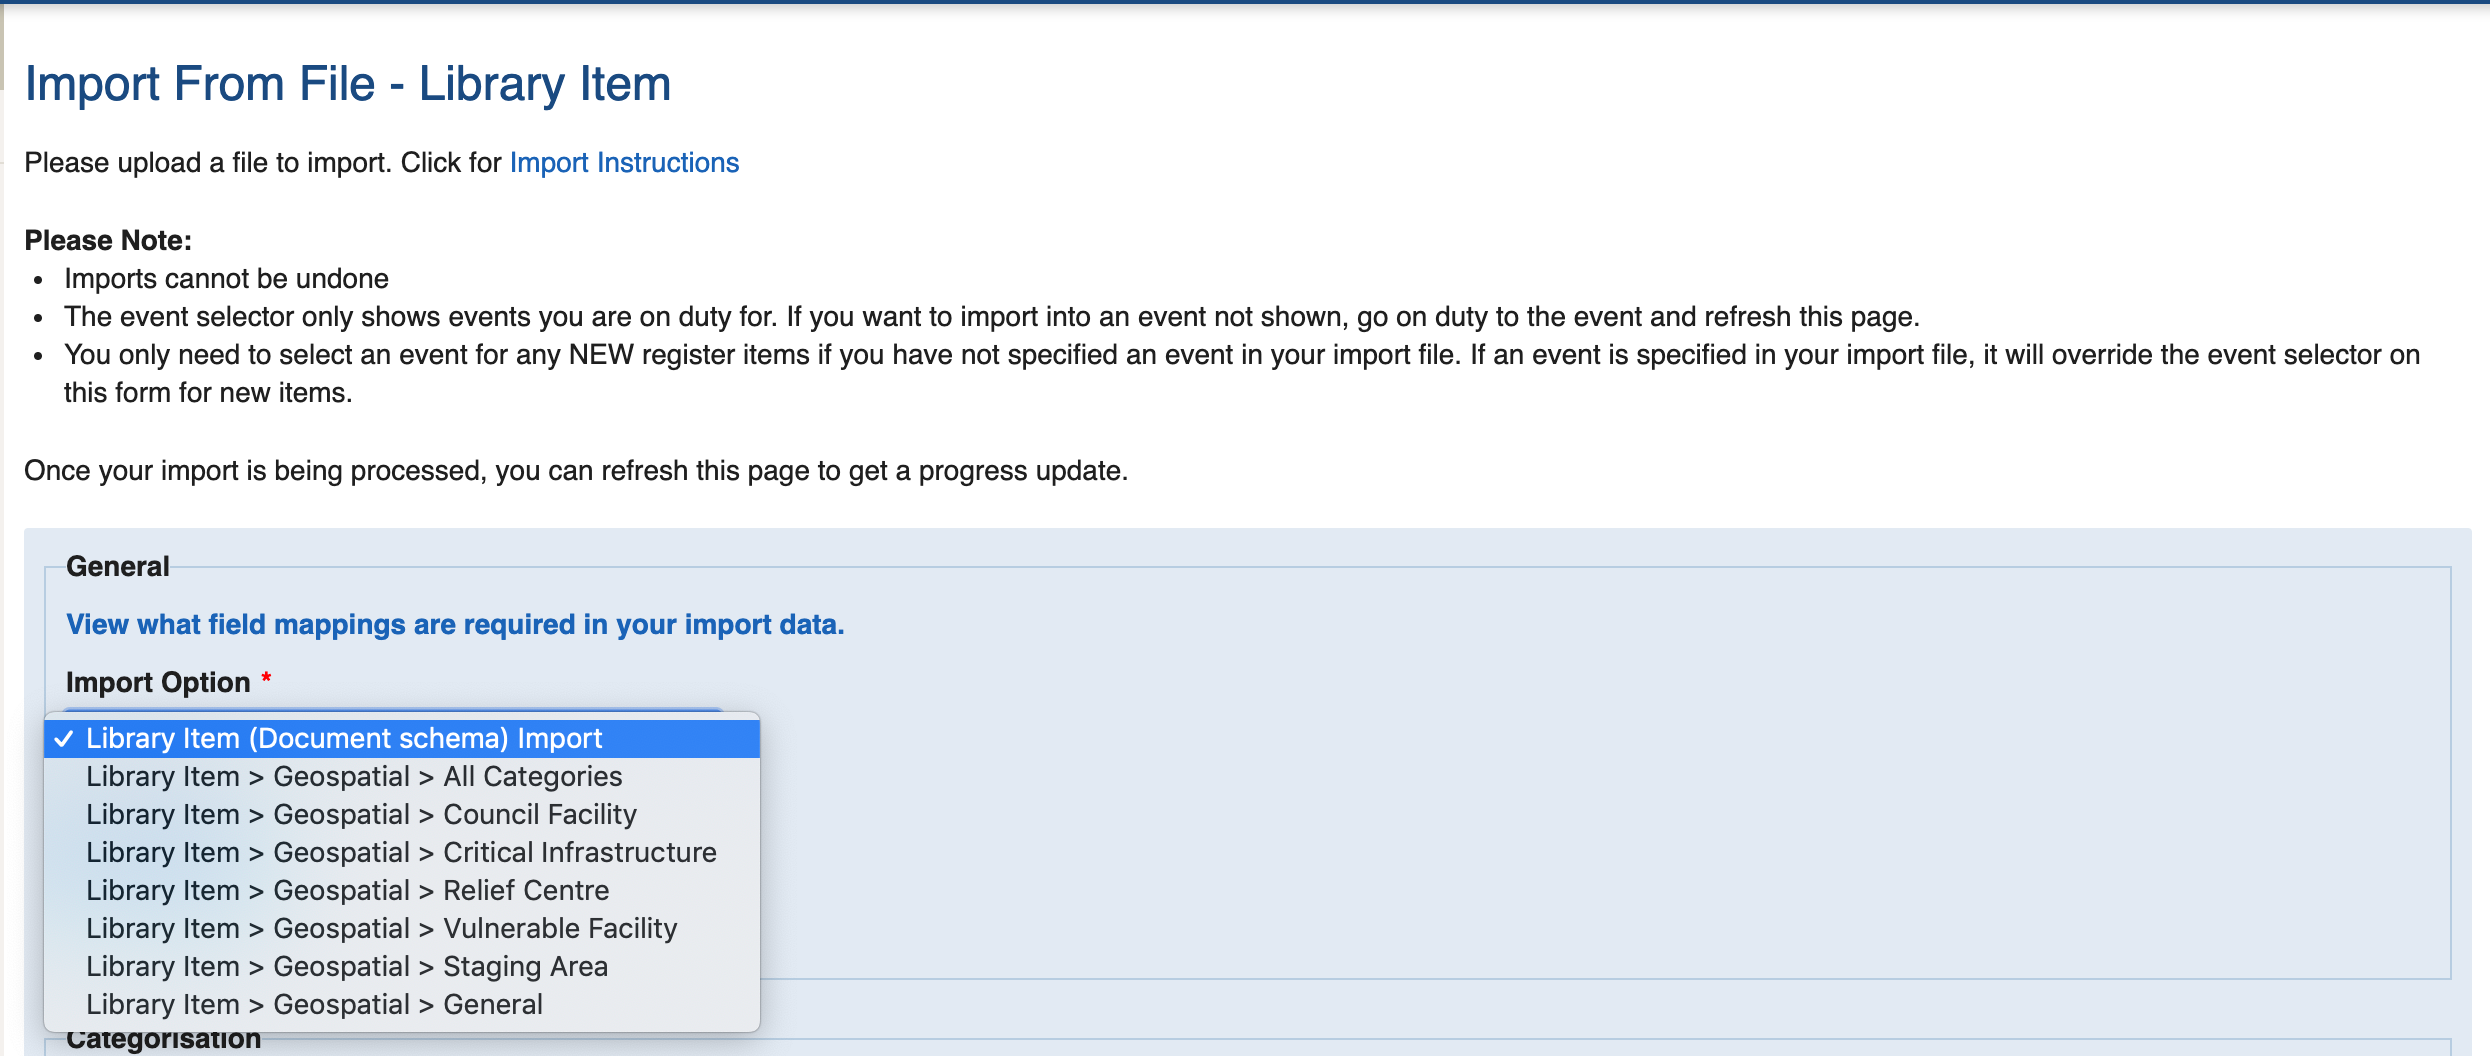
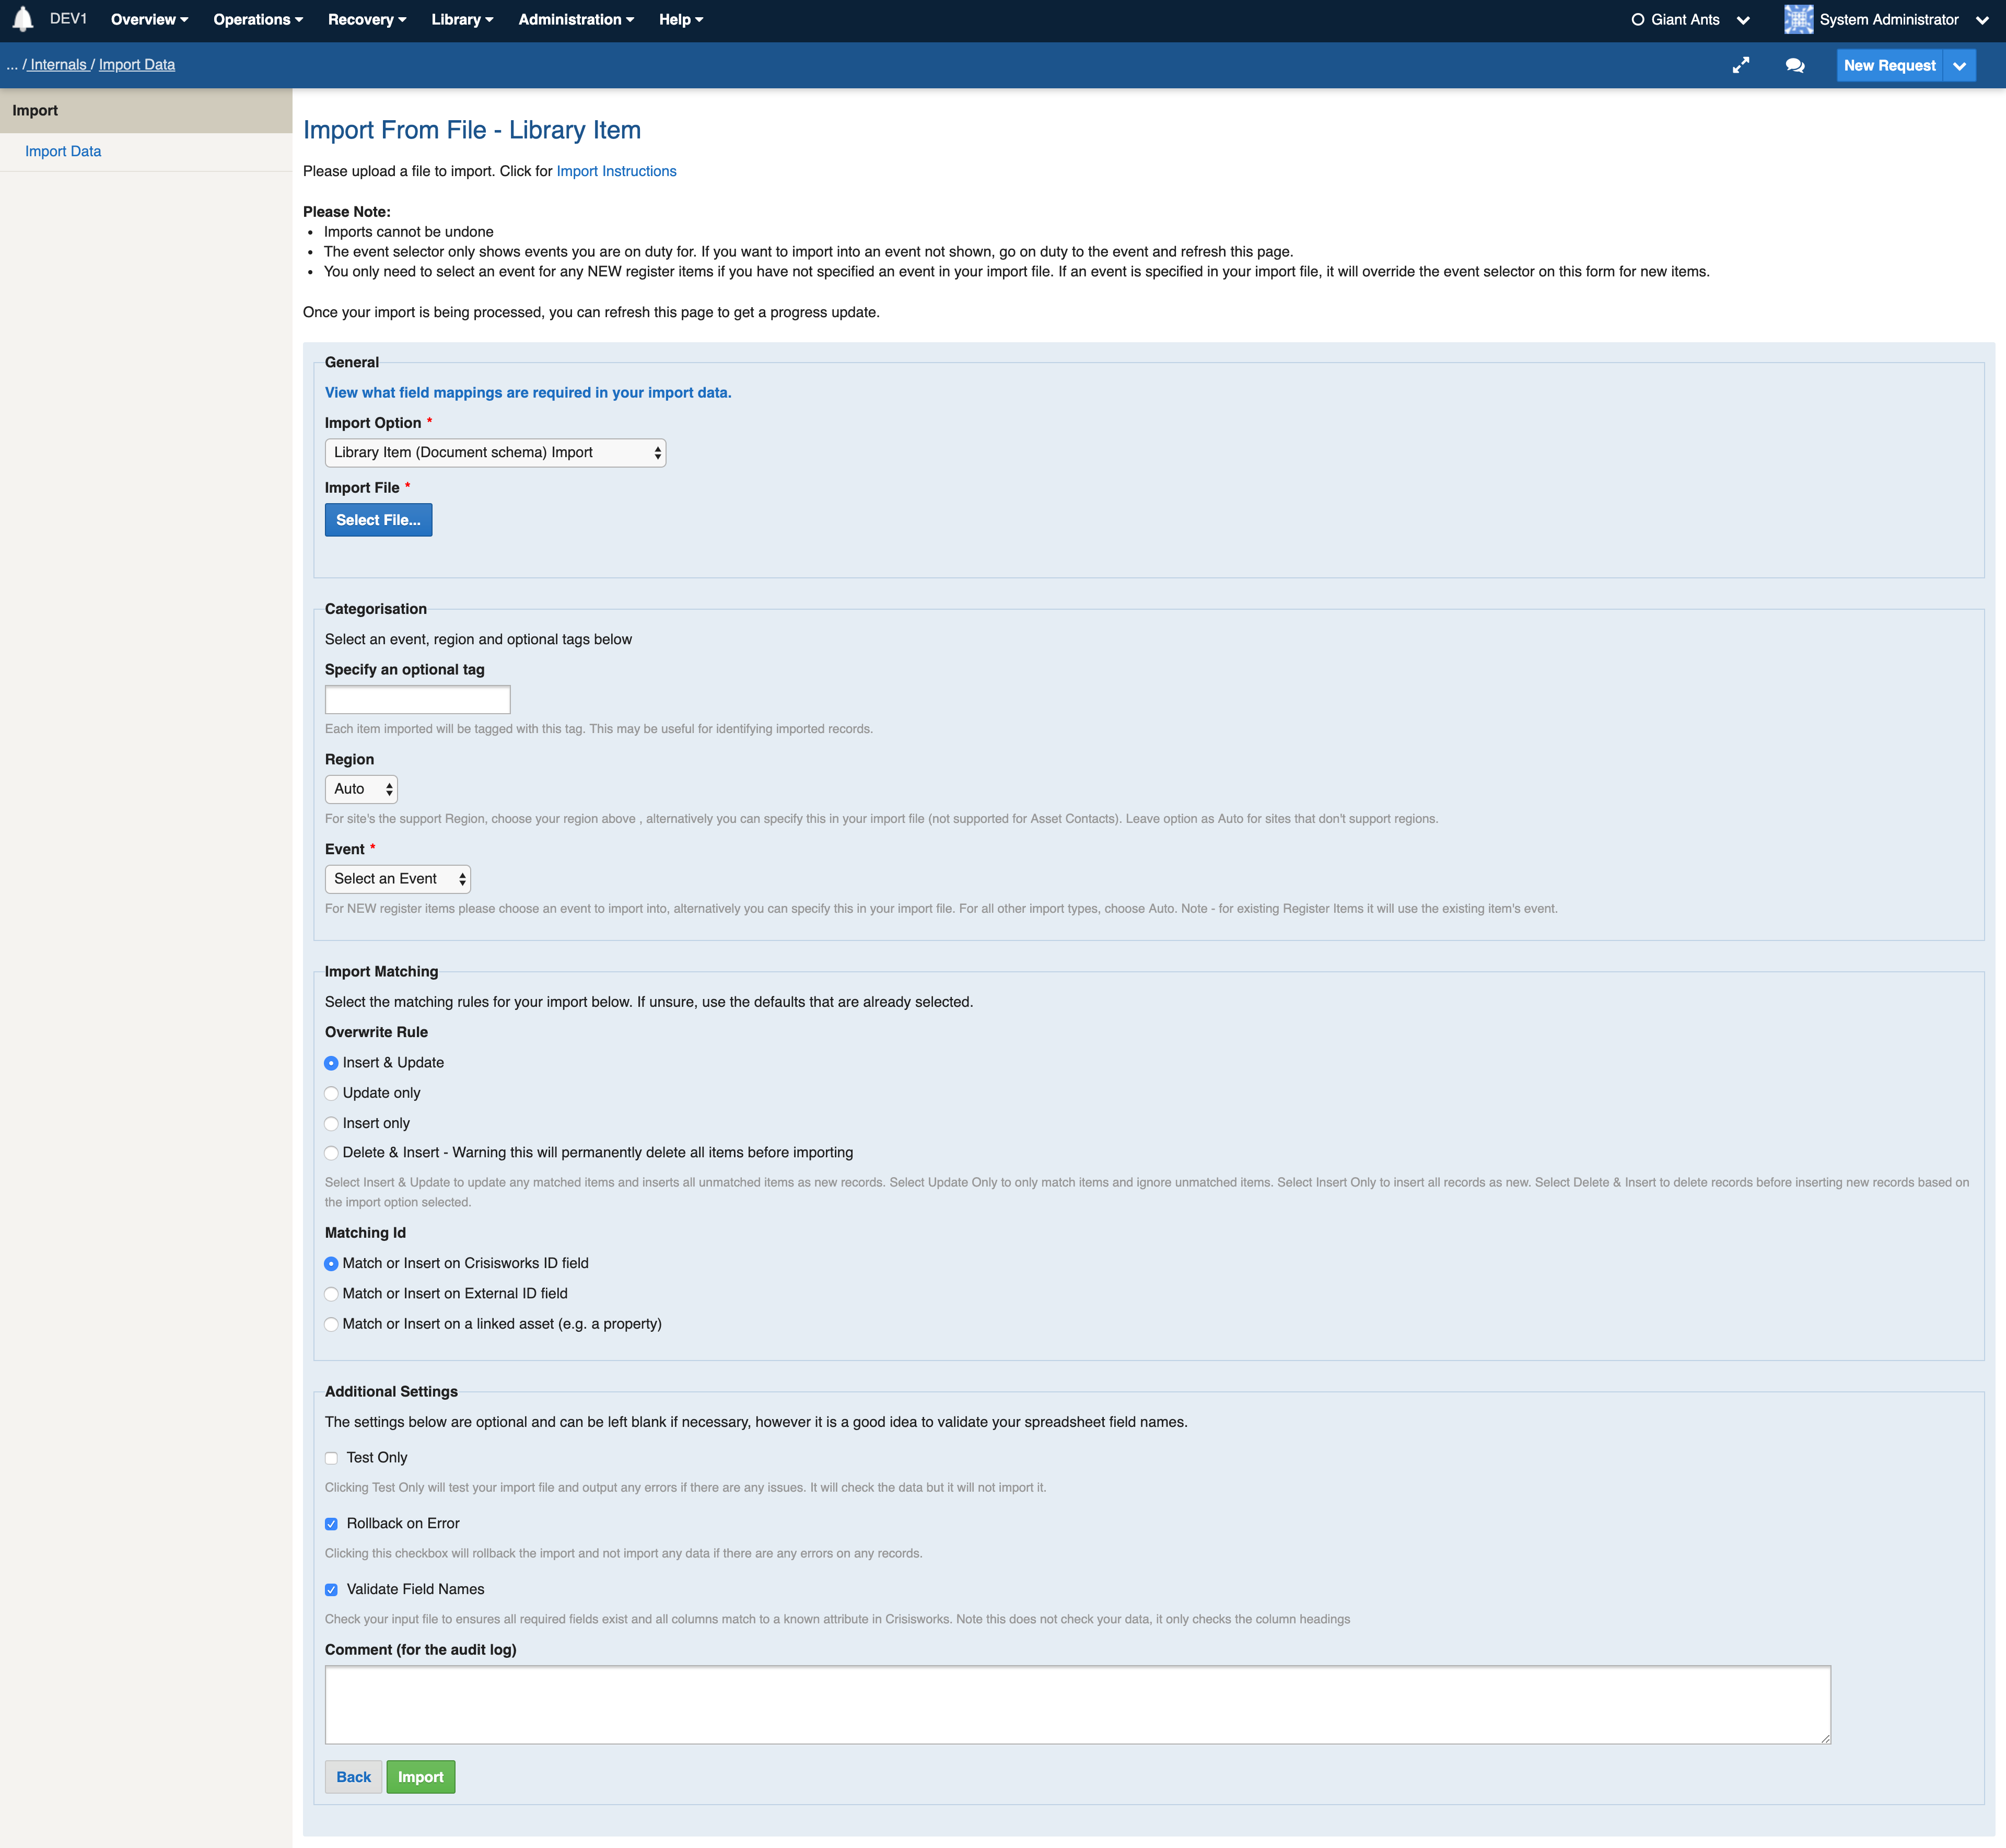
For example, when choosing the type of Library Items from the drop down list, the second page will only display the available import options for the Library register. See screenshots below.
Page 1 - user chooses Library Items . Page 2 - only Library Item import options are displayed to choose from.
Page 2 of import process
General
Field Mappings
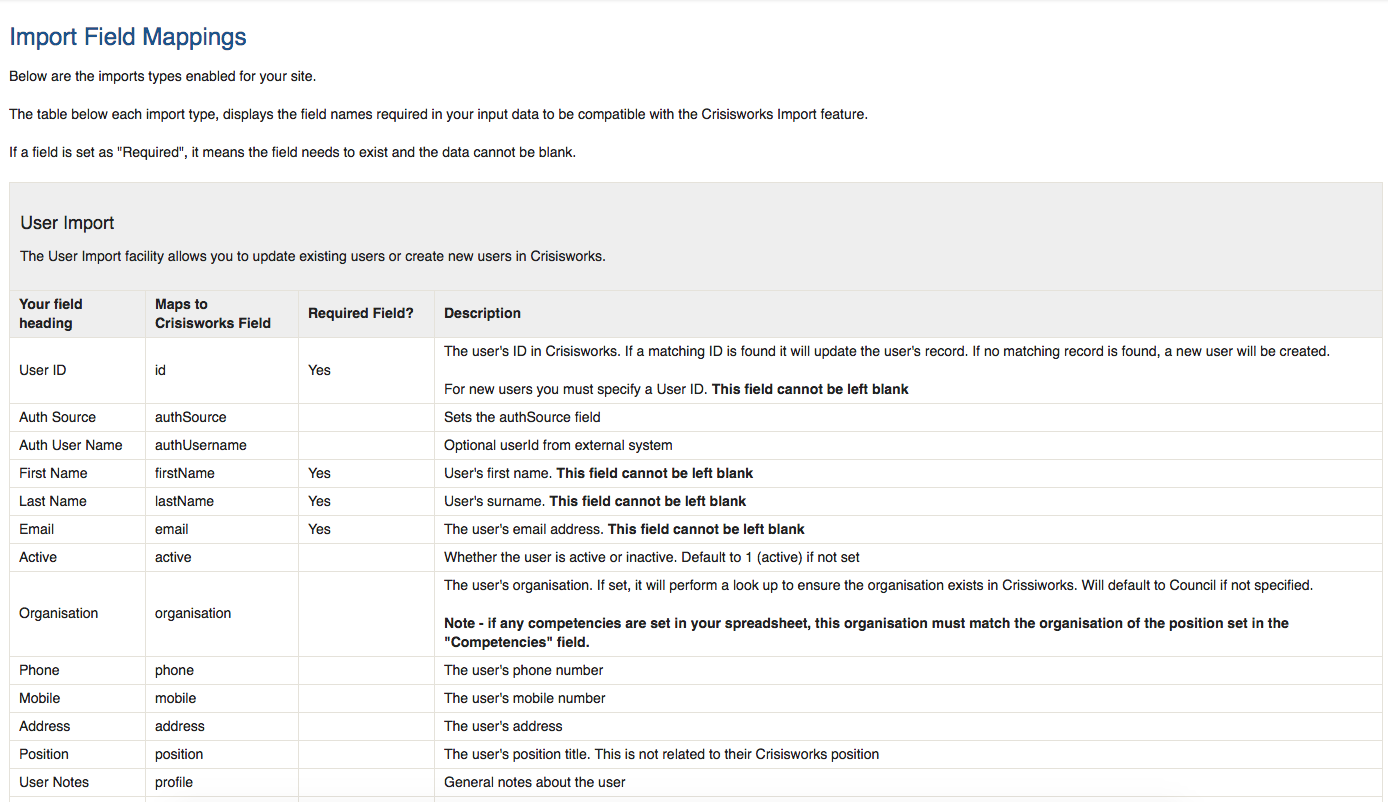
Click on the "View what field mappings are required in your import data." link located under the General heading to view what fields are required in your input data.
The url will be https://[your site].crisisworks.com/admin/import/field-mappings however you need to be logged in, and have access to perform data imports. Some sites have different imports or customised imports, so we can't show you the information on this page, just a sample below.
This page lists all enabled import types for your Crisisworks site. It will display what fields are needed in your input data for all of the import types.
Import File
You will need to upload an import file from your computer.
Most items (CSV)
For any non-asset items, you will need to create a CSV file. To create the CSV file, it may be easier to export data to a report first by selecting the appropriate records in the Datagrid and clicking the Export to Report button. Once the report has been run, you can then click the "To CSV" button. This will generate a CSV file that is compatible with the import system. Make any necessary changes to the records in the CSV file (including adding new records if necessary), save it and choose this file to import.
Assets (ZIP or CSV)
The Asset import feature supports ZIP or CSV files to be uploaded into the Import File field. For SHP and TAB files, ensure you upload this as a ZIP file containing the other associated files needed. You cannot upload a SHP or TAB file directly into the Import File field, it must be contained within a ZIP file with its associated files.
Note - Asset Contacts only supports a CSV file.
Clearing Field Data
If column headings or data is not specified in your import file for existing items, the existing data will not be removed. The only exception is for Competencies for User imports. If you specify the Competency column heading in your import file, you must specify all competencies for any existing users otherwise these will be removed.
If you wish to remove data for a field of an existing item, set the value "[NULL]" into the field in your import data. If this value is found in your import data, it will clear the existing value. For example if you wish to clear tags for the userId of "bob", simply type "[NULL]" in the Tags column of your data on Bob's record and all existing tags for Bob will be removed.
Categorisation
Event (for new register items only)
The Event selector will only display if a register item type has been selected on the first page. The event selector will not display for Users or Assets as these types of records don't link to events.
The event selector will only list the events you are currently participating in. If you do not see an event in this list, you must go on duty for the event for it to appear in this Event list.
If you choose an Event from the list and you have existing records in other events, it will not update the item's event. The current item's event will override what is selected here.
If you wish to add records to multiple events, you can specify the Event ID in your CSV file. As long as you are participating in these events, the records will be added to these separate events. The Event ID specified in your CSV file will override the Event selected on the Import Form for any new records.
Region
For site's the support Region, your available regions will be listed in this drop down list. Choose which Region you would like to import data for or alternatively you can specify this in your import file. Leave this option as Auto for sites that don't support regions.
Specify an Optional Tag
You can optionally specify a tag that will be added to every record that is imported. This may be useful for identifying which records were imported. Please note - this will not overwrite any existing tags, it will simply add a new one. You can leave this field blank if you do not wish to add a tag to each imported record.
Import Matching
Overwrite Rule
There are 4 overwrite rule options to choose from when importing data:
- Insert & Update - this is the most commonly used method when importing data. If an existing item is found, it will be updated. If an existing item is not found, a new item will be inserted.
- Update only - no new items will be inserted with this option. Only items where a match is found will be updated. Any items in your import file that do not find a match will report an error that an existing item could not be found.
- Insert only - all items in your import data will be inserted an no existing items will be updated. If any matching items are found an error will be reported that the item was not inserted due to a matching record being found.
- Delete & Insert - this option is not available for all import types. This options will delete all items based on a pre-set criteria and will insert new items. Currently this option is only available for Asset Contacts and Library Geospatial Data for a specific category (see the specific Library Items import page for more information).
Matching Id
You can select which ID field you would like to match existing items on. Most commonly you will use the existing Crisisworks ID, however if you are importing data from an external system you may specify to match on an External ID field.
For Assets, this is the "code" field. For most other items it is a field called "External Id". For items to be matched on an external Id, this data will need to be set on an initial import first and then subsequent imports can be matched on this field.
A third option is available called "Match or Insert on a linked asset (e.g. a property)". For any import types that have an asset associated with them, you can either specify an asset code or an asset's address. If an item is found with a matching asset of that code or address it will update this item.
Additional Settings
Test Only
It may be useful to test your import before actually importing your data. To do this, click on the Test Only checkbox. This will run through the import process and attempt to import each line of the import file but it won't actually save the records. Once the test import is complete it will return a "Complete" or "Error" status allowing you to view the details of any errors so you can fix up any issues before performing an actual import of your data.
Rollback on Error
If selected, if there are any errors with your import the entire import will be rolled back and nothing will be inserted, updated or deleted. It is always a good idea to to keep this option selected.
Validate Field Names
If this is selected, before the import commences it will analyse the import file and will alert you if there are any issues with your column headings. It performs 2 checks:
- that all required fields for the import type exist in the import file
- if you have any additional fields in your import file that are not specified for this import type. This can be helpful to look at as it is possible that a field can be misspelt or not have the correct spaces or capitalisation required. If you get an error about the additional fields in your spreadsheet, you can either remove these additional fields from your input file or you can untick the Validate Field Names checkbox to allow you to have these additional fields. These additional fields will be ignored on import.
Comment
The comment box allows you to enter an optional comment which will be displayed on the Dashboard and audit history log once the import is complete. Leave this field blank if you do not wish to add a comment for audit history.
Click the Import button to commence the import. You can refresh the page at any time to display the status of your import in a table at the bottom of the import screen. (See Viewing Details of your Import below).
Viewing Details of your Import
Once your import has been processed, a table will appear at the bottom of the import screen showing the status of the Import. Once the import has completed, it will either update to a status of "Complete" or "Error". You can click on the View Details link to view information on the import. Any errors that occurred will be displayed in here.
If any errors are found with your data, it will report on each specific error in the View Details area. The error items will be skipped and the import process will continue and save all of the correct items.
