Importing Asset Contacts into Crisisworks (Ratepayer/owner data)
You can import contact data for your Assets via a separate import. This will replace the old Asset Ratepayer data.
More than one contact can be linked to an Asset. This is useful for customers using the FPN module and generating letters as this will generate multiple letters for an asset if there are multiple contacts linked to it.
- If there are multiple owners for an asset/ property, you can have multiple lines in your import file (one per owner), each with the same asset code.
When your Asset Contacts get imported, it will remove all existing Asset Contacts and re-import them. This means that if you need to make any changes to your asset contact data, you will need to re-upload all of the Asset Contacts each time you perform an import.
The Asset Contacts import does not support matching on any id's and will simply delete and create new records on each import.
Please read the general Importing Data into Crisisworks instructions before proceeding with Importing Asset Contacts.
Importing Asset Contacts
Import Data
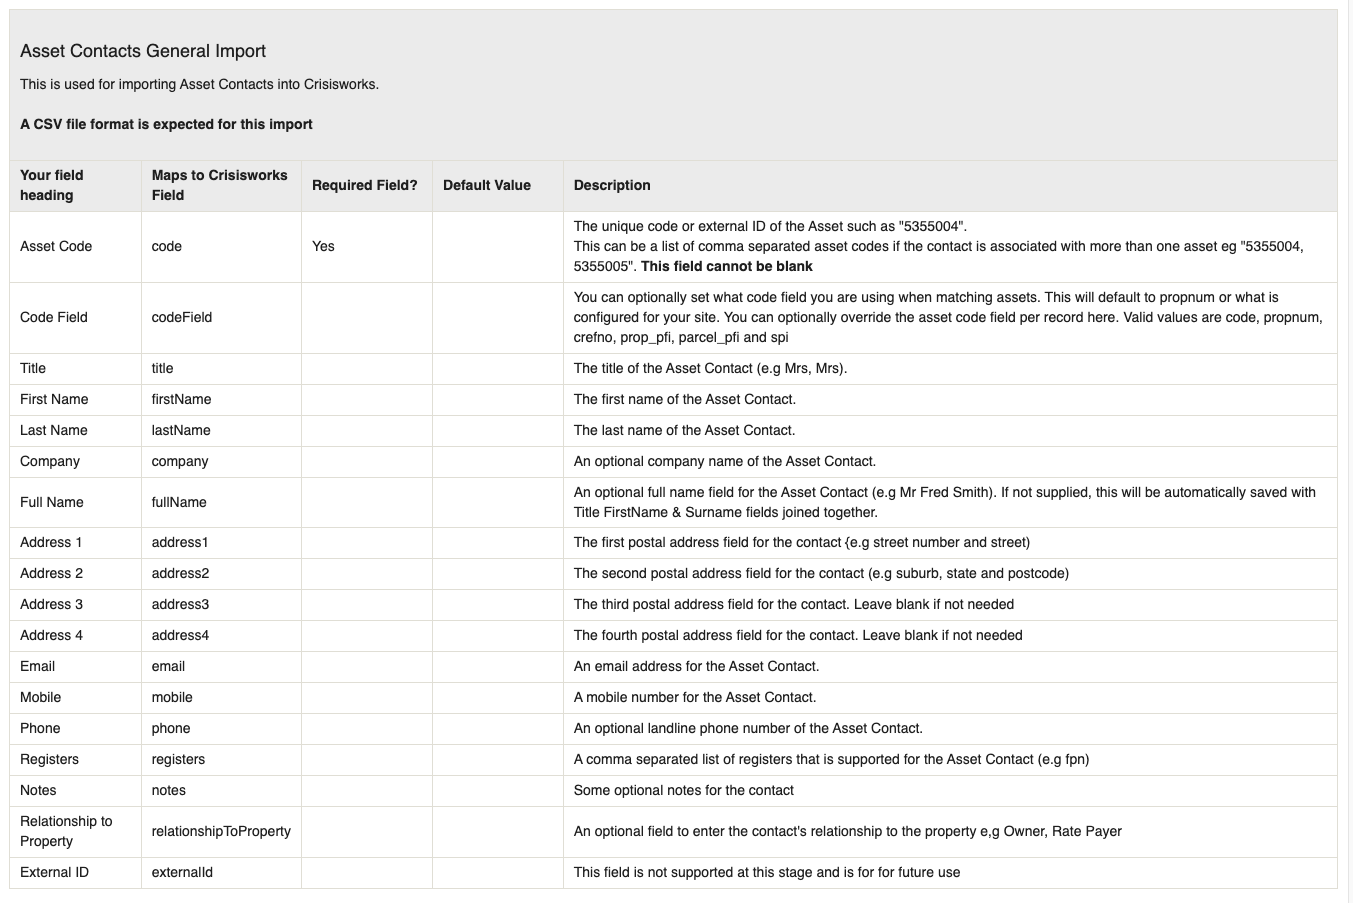
You will need to create a CSV spreadsheet of your Asset Contacts. The contacts need to be linked to the Asset by adding the Asset Code (or prop num) into the spreadsheet. You can add multiple asset codes onto the same line separated via commas, for one contact.
Below is a list of the fields you will need in your spreadsheet. The 'Your field heading' column are what the column headings need to be in your file. You do not need to have all of the columns in your spreadsheet if there is no data for them.
Here is a sample CSV file that you can base your import on. The Asset Codes need to match your site's Asset Codes.
Import Form
To import the Asset Contact Data, navigate to the Import Form go to Administration > Setttings > Import Data.
From the "What do you want to import?" drop down list on the Import Form, select the "Asset or Asset Contacts" option under the Assets heading. You will then be presented with available import options relating to Assets or Asset Contacts.
Choose the Asset Contacts General Import import option.
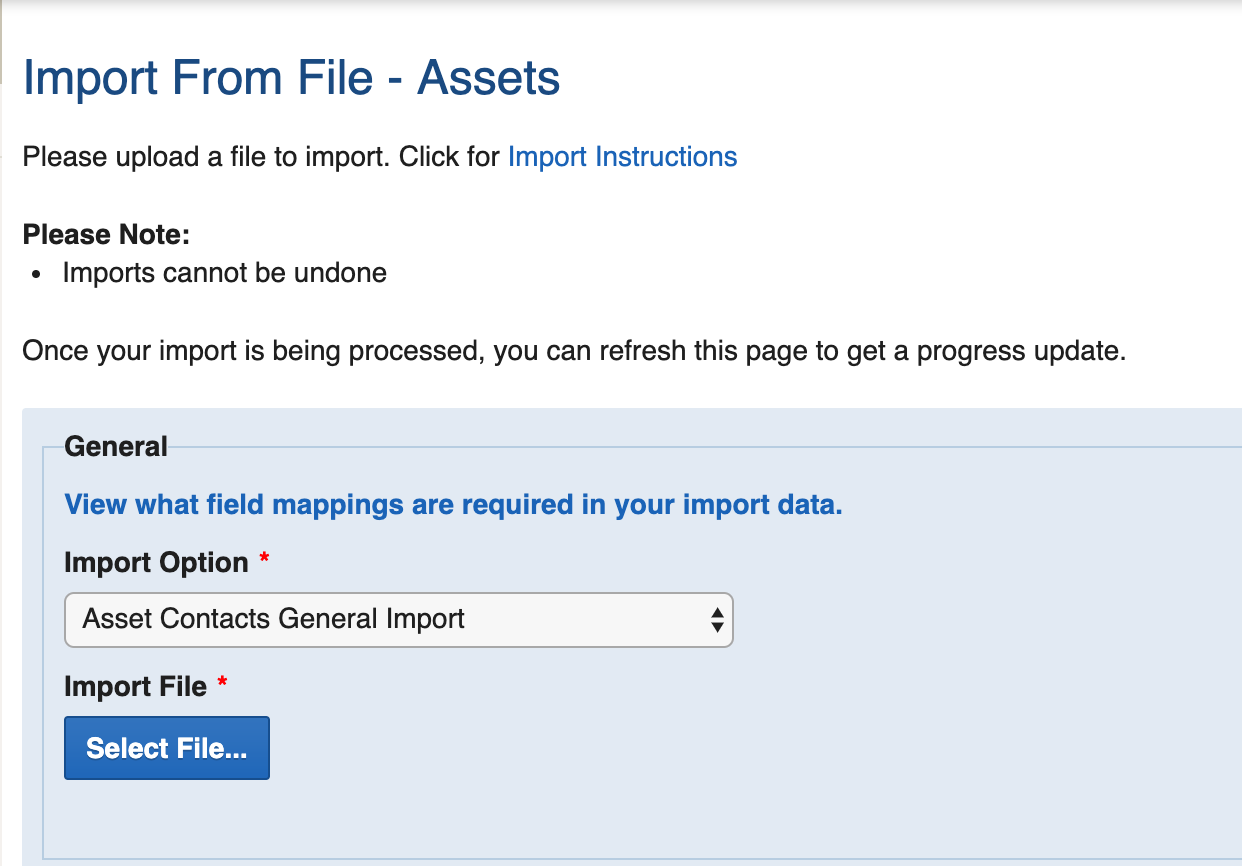
Upload your CSV file into the Import File area by clicking on the blue Select File button.
Categorisation
For Region, you can choose the Auto option.
Import Matching
For Asset Contacts, the only overwrite rule that is supported is the Delete & Insert option. Select this option for your import
The Matching Id is ignored for this type of import so you can just use the default first option for this.
Additional Settings
It is always a good idea to click the "Test Only" checkbox before performing your import. This will perform everything other than actually saving the data. This means it will display any errors with your data so you can ensure your import file is correct before doing a real import.
Click the green Import button to import your Asset Contacts.
To use these contacts with the Generate Merge functionality, you can visit the A guide to creating custom mail merge templates page.