A guide to creating custom mail merge templates
- Scott Davey
- Peter Kakris
- Jennifer Joseph
- Joanne Hocking
This blog post captures some of the process and code tips and tricks used to create a PDF template for FPN and other modules.
Print Merge templates are used to generate letters (notices) for the records you choose in bulk.
When you generate a batch of letters, Crisisworks will generate and attach the letter(s) to each record and will export all of these new individual letters in bulk so they can be added to your documentation management system. When using the newer HTML templates an additional large PDF is generated which combines all of the smaller PDFs together into a single PDF, so you can print the batch easily.
In 2018 a new HTML system for generating notices was released providing additional features which could not be achieved with the older Microsoft word merge template method. The additional features include:
- embedding images in the letters
- using signatures from officers' own user profile so a single template can be used for all officers
- adding the ability to use conditional <IF> logic
- a more robust solution
While the HTML template is more complex to set up in the first year, it is worth the effort! If you need a hand please ask us to do it for you. If you have a straight forward setup that we can do in a couple of hours there will be no charge.
Example
Here’s the 3 page notice.
|
|
|
|---|
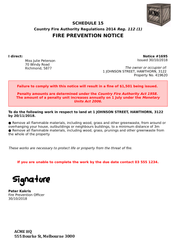
This was created using the Mail Merge Template feature of Crisisworks. The letterhead and top title information on the first page were uploaded as a PDF, and the dynamic text was created using this guide. The reference section of this guide below contains the full source of this example.
Crisisworks uses Hypertext Markup Language (HTML) to create its letters, and this guide explains how to create effective letters using this approach.
The HTML is merged with the merge tokens which look like {$assetContact.fullName}, {$ASSIGNEE_NAME} etc which is similar to how Microsoft Word works with its own merge template.
The reason for switching to HTML for merge templates is to generate PDF letters and to be able to add photos and officers signatures from the officer's user preference. This means you can have one template for multiple officers.
If you have never used HTML before this can seem scary, the shortcut is to go to the bottom of this page and copy the two sections into the merge template settings section and edit the text/words. If you need a hand formatting and you have never used HTML or CSS you may need to ask for help from someone in IT or from Datalink. HTML is a common standard used to create web pages and CSS is used to format HTML pages with a style sheet.
To apply your organisation's own branding you can upload a single page PDF letterhead template, which would be mostly blank aside from your logo and address etc. NOTE It must be one page only. This PDF is an underlayer for page one only, the HTML that is created will sit on top of it.
Where to start
You can manage your new or existing templates from the Administration menu then select Settings. From the settings screen, select Merge Templates.
From this screen, you can edit an existing Merge Template or create a new one.
Copying an existing Template
Out of the box you will see a sample FPN HTML Template that comes with Crisisworks. You can create a new Mail Merge Template from scratch as per the 'Create a new Mail Merge Template' instructions below, or you can click on the Copy Template button to copy the template. This will copy all of the settings of the sample template and allow you to edit and customise it to suit your needs.
To copy a template, click on the name of the template you wish to copy.
Click on the Copy Template button as shown in the screenshot below.
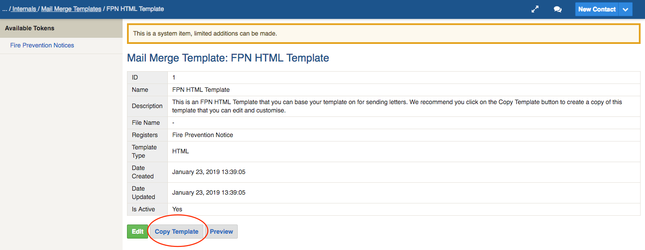
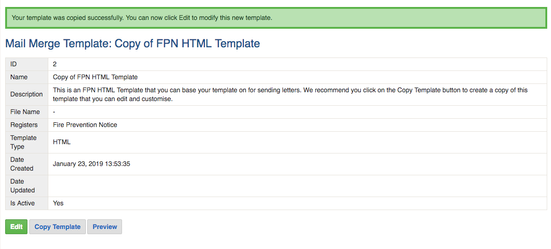
This will automatically copy all of the settings from the template into a brand new template. The name will be called "Copy of <your template name"> and a message saying that you successfully copied the template should appear.
You can now click on the Edit button and change any setting to customise it to your needs.
Creating a new Mail Merge Template
From the mail merge settings page Administration→Settings→Merge Templates press the "New Mail Merge Template" button in the top RHS corner of the screen.
On the first page of the creation, wizard pick HTML and pick the "Load Sample HTML" option (the MS Word option will be phased out, and has been kept for a while to support last years users).
The top large text area is the "Letter Contents", this is where the main template goes into, you can identify keywords and change them in here. It may be easier to copy the text out into a better HTML text editor then paste it back in when you are done. NOTE this letter contents section is not a FULL HTML page on its own, it is 3/4 of a page.
The 2nd large text area is the "Additional CSS", this is where formatting rules are applied, such as font, font size, spacing, colours etc.
You can upload your PDF letterhead template and set the margins for the first page. The letter head must be a single page PDF file. Note you can set the Addressee details location to fit in a windowed envelope, this location is set irrespective of the rest of the page, to ensure it is exactly where it needs to be regardless of where other information may flow to see the information on the <address> tag further below.
When you are done, save the record. On the next page, you can preview the merge letter. What it does is merge the current Merge Letter with the first record in the current event. So it will help to make sure that record has photos, notes and details that will test the template properly, you may need to work in a test event for this.
Listing the Merge Tokens
From the mail merge settings page, Administration→Settings→Merge Templates select any of the templates records.
Once viewing the summary screen for any template record you can select the Fire Prevention Notices under the Available Tokens which is found on the top LHS of the screen. This will list all of the tokens available to you. Note customers with their own custom modules will have different tokens.
To use this guide, when creating your template you will need to copy the Additional CSS from the reference at the bottom of this page.
The code snippets used on this page help explain the elements in the HTML and CSS found at the bottom of the page.
The basics
This system uses basic HTML along with some mail merge tokens and simple CSS to build the templates.
<article>
  <h1>My page heading</h1>
  <p>I am a paragraph with a <strong>set of bold words</strong>.</p>
  <p>Your name is {$personName}.</p>
</article>
CSS classes are used to control formatting and layout. These will be most commonly added to <p> tags, but can be added to any tag that wraps content.
<p class="warning-box warning-text center-text">
  I am going to be big, red and centred.
</p>
Note that the template starts and ends with <article>, and uses basic HTML elements. All mail merge tokens look like {$token} and the list of available tokens are available from within the system and vary from register item to register item.
Also, don’t nest paragraphs inside paragraphs, and don’t place headings inside paragraphs — although it will appear to work, this is illegal in HTML and not good practice.
Layout controls
Some basic box controls allow paragraphs to be moved around the page.
Note, you should use a <div> rather than a <p> if laying out both a left and a right column.
css class | description |
|---|---|
left-box | Creates a text box and places it on the left half of the page. |
right-box | Creates a text box and paces it no the right half of the page. |
warning-box | Creates a bright red warning message |
Text formatting controls
Some basic text formatting classes allow for common formatting within the paragraphs.
CSS Class | Description |
|---|---|
left-text | Left justifies the text |
right-text | Right justifies the text |
center-text | Centre justifies the text |
justify-text | Fully justifies the text |
small-text | Makes the text smaller than the base font size (in CSS this is currently 85%) |
warning-text | Makes the text red and bold. |
| top-heading | This provides alternative sized headings for the top page |
These can be combined — for example:
<p class="small-text warning-text center-text">
  I am a small, centred warning.
</p>
Also, you have HTML elements that can be used for semantic formatting — here’s the common ones:
HTML Element | Description |
|---|---|
<strong> | Boldfaced text |
<em> | Italicised text |
<ol> | Ordered list (e.g. numbered) |
<ul> | Unordered list (e.g. bullet points) |
<h1>, <h2>, <h3> | A page heading, a sub-heading and a small heading. Tip: these do not go inside paragraphs. |
<br /> | A line break (e.g. a carriage return). |
<hr /> | A page break. |
<!-- and --> | Comments that do not appear in the output |
Addressing for windowed envelopes
A special HTML element <address> is used to handle windowed envelopes.
If you want to use windowed envelopes, place your address tokens inside this element. If you do this, the address will be positioned exactly where it needs to be for your envelope, and the contents will “float above” the rest of the document, normally requiring a few carriage returns ( <br /> ) to position your body text.
The position of the address window is controlled by the system, and you can change the top and left position by entering in the number of millimetres from the edge of the envelope.
Example
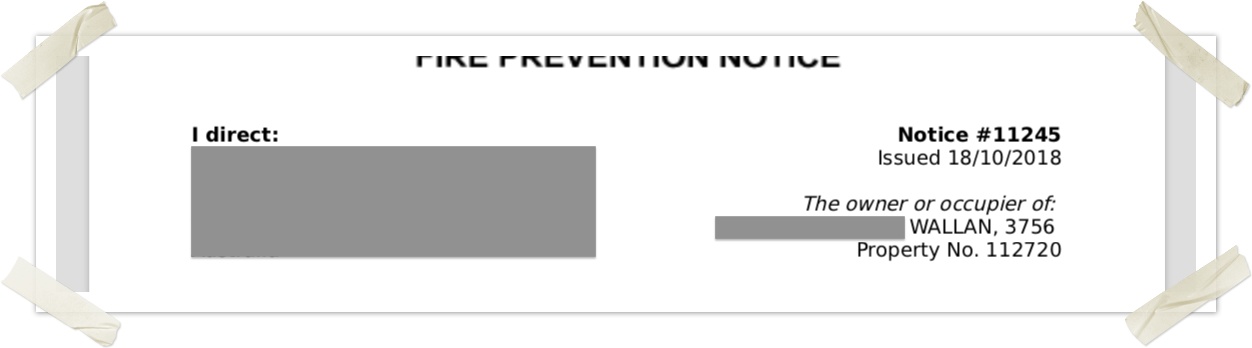
The following example shows the windowed envelope in grey with the tokens.
%20copy.png?version=2&modificationDate=1540879250518&cacheVersion=1&api=v2&effects=border-simple%2Cblur-border%2Ctape&width=963&height=350)
<!-- The address block can be positioned for windowed envelopes by uncommenting the positioning CSS -->
<address>
{if $overrideOwnerDetails}
{$overrideOwnerDetails|nl2br}
{else}
{$assetContact.fullName}
<br />
{$assetContact.address1}<br/>
{$assetContact.address2}<br/>
{$assetContact.address3} {$assetContact.address4}
{/if}
</address>
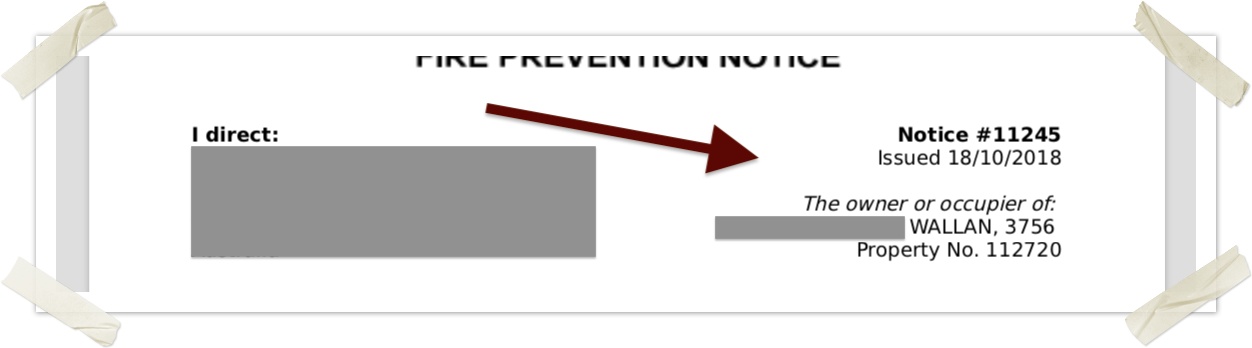
<article>
<!-- Put one box to the left and one to the right to format the top bit-->
<p class="left-box">
<strong>I direct:</strong>
<!-- Leave a big space here for the address window, which was defined above and is absolutely positioned here -->
<br />
<br />
<br />
<br />
<br />
</p>
<p class="right-box right-text">
<strong>Notice #{$noticeNumber}</strong><br />
Issued {$MERGE_DATE}<br />
<br />
<em>The owner or occupier of:</em>
<br />
{$item.Asset.friendly}
<br />
Property No. {$item.Asset.friendlyCode}
</p>
</article>
Note that in this example, the <address> element has been placed outside of the <article> body. This is optional, but aids in understanding that it floats above the body rather than being positioned where it was written.
As an aid, the CSS rules place a light grey background on the address section so you can see where it is. This can be controlled in the Additional CSS section.
Worked Examples
Standard paragraphs
<p>
  This is a standard paragraph. It will be the full width of the page.
</p>
Two columns
These two paragraphs will be side-by-side in a two-column format.
<div class="left-box">
	<p>
	    <strong>I direct:</strong>
	    <br />
	    {if $overrideOwnerDetails}
	        {$overrideOwnerDetails|nl2br}
	    {else}
	        {$assetContact.fullName}
            <br />
            {$assetContact.address1}<br/>
            {$assetContact.address2}<br/>
            {$assetContact.address3} {$assetContact.address4}
	    {/if}
	</p>
</div>

<div class="right-box">
	<p>
	    <strong>Notice #{$noticeNumber}</strong><br />
    	Issued {$MERGE_DATE}<br />
	    <br />
	    <em>The owner or occupier of:</em>
	    <br />
	    {$item.Asset.friendly}
	    <br />
	    Property No. {$item.Asset.code}
	</p>
</div>
<br />
Tip: put a <br/> at the end of the two paragraphs to avoid formatting problems of the contents following these boxes, in the event that the two boxes aren't the same height.
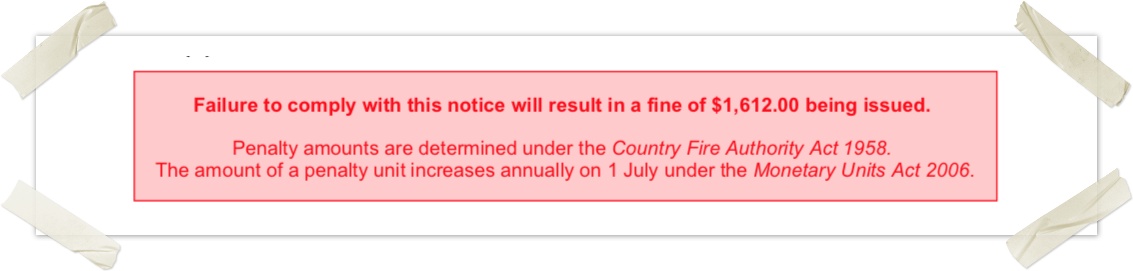
A warning text box
This puts a big, red warning box onto the page,
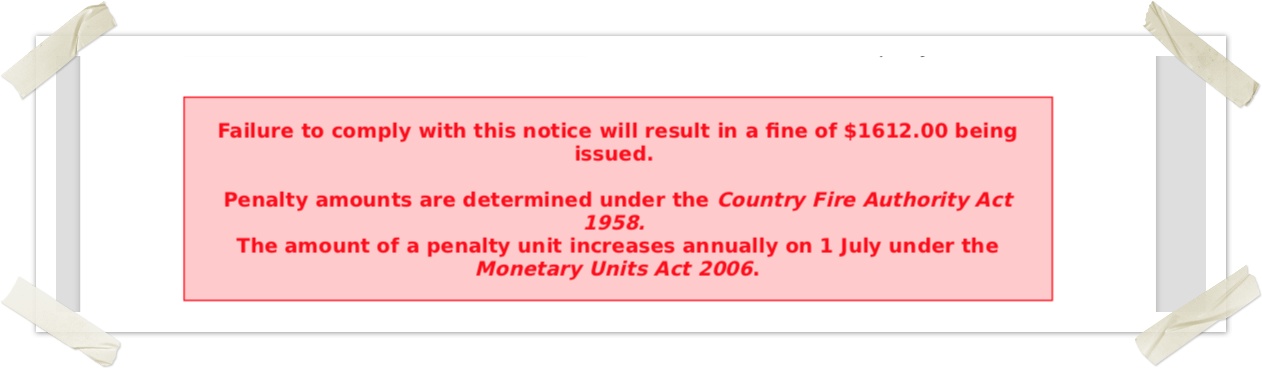
<p class="warning-box warning-text center-text">
    <strong>Failure to comply with this notice will result in a fine of $1612.00 being issued.</strong>
    <br /><br />
    Penalty amounts are determined under the <em>Country Fire Authority Act 1958.</em>
    <br />
    The amount of a penalty unit increases annually on 1 July under the <em>Monetary Units Act 2006</em>.
</p>
Note that in this example, we are also using some text formatting classes — see below.
Using mail merge tokens
Here’s a basic example of mail merge tokens.
<h2>
    To do the following work in respect to land at {$item.Asset.friendly} by {$IN_THREE_WEEKS}.
</h2>
Alternatively, you can use the due date of the item. Note - use the custom {$due} token for this. This will display in the correct date format of dd/mm/yyy and is also useful if you have Process Workflow Updates on Items turned off for your template. If Process Workflow Updates on Items is turned off, it will still calculate what the due date will be and it will appear in the letter even though it doesn't update the item.
<h2>
    To do the following work in respect to land at {$item.Asset.friendly} by {$due}.
</h2>
Right box with right justified text
Notice here now the box and text CSS rules are added together to position the text to the right side ofht page,, and also align the text.
<p class="right-box right-text">
    <strong>Notice #{$item.id}</strong><br />
    Issued {$MERGE_DATE}<br />
    <br />
    <em>The owner or occupier of:</em>
    <br />
    {$item.Asset.friendly}
    <br />
    Property No. {$item.Asset.code}
</p>
A big, red warning box
Here’s a warning box that combines the box colour, the warning text colour and the alignment to the centre.
<p class="warning-text warning-box center-text">
      <strong>Failure to comply with this notice will result in a fine of $1612.00 being issued.</strong>
      <br /><br />
      Penalty amounts are determined under the <em>Country Fire Authority Act 1958.</em>
      <br />
      The amount of a penalty unit increases annually on 1 July under the <em>Monetary Units Act 2006</em>.
  </p>
Red warning wording without the box
The style for warning-text is different to warning-box, so you can use one or the other.

   <p class="warning-text center-text">
		<strong>
	        If you are unable to complete the work by the due date contact 03 5734 6200.
		</strong>
    </p>
Only include a paragraph if data exists for it
This shows how to conditionally include a heading and a paragraph based on the presence of text.
{if $specialNotes}
    <h2>Special Instructions:</h2>
    <p>{$specialNotes}</p>
{/if}
Adding a top heading to the front page of the notice
To add a heading to the front page of the notice, you can use the top-heading class along with h1, h2, and h3, where each heading 1 is largest and heading 3 is smallest.
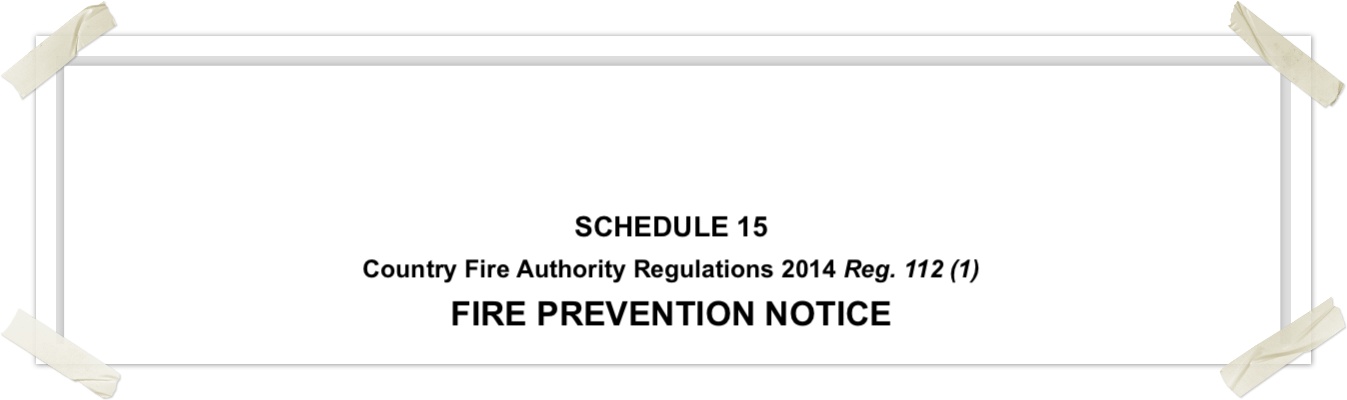
<div class="top-heading center-text">
    <h2>SCHEDULE 15</h2>
    <h3>Country Fire Authority Regulations 2014 <em>Reg. 112 (1)</em></h2>
    <h1>FIRE PREVENTION NOTICE</h1>
</div>
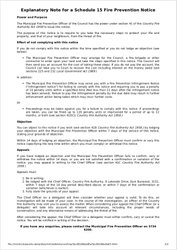
Adding smaller legal text to the last page
This example shows how to make text smaller to fit onto one page.
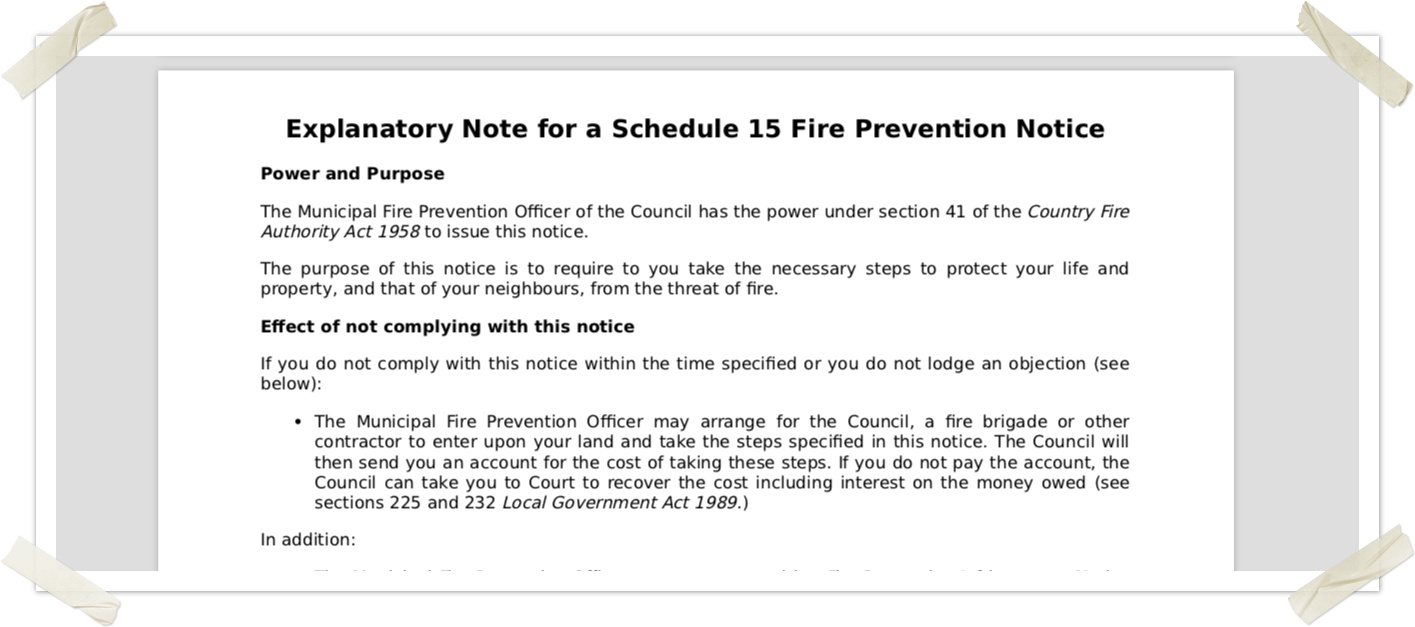
<!-- A page break, followed by a carriage return to position the heading where we want it -->
<hr />
<br />

<!-- We want our heading centred -->
<h1 class="center-text">
  Explanatory Note for a Schedule 15 Fire Prevention Notice
</h1>

<!-- We want all the page text small and fully justified -->
<div class="small-text justify-text">
    <!-- The text is regular HTML from here... -->
    <h2>Power and Purpose</h2>
    <p>
        The Municipal Fire Prevention Officer of the Council has the power under section 41 of the <em>Country Fire Authority Act 1958</em> to issue this notice.
    </p>
    <p>
        ... additional paragraphs, liste, etc (see full example) ...
    </p>
</div>
Adding a custom date
There are a few system build tokens that output dates. For example:
| Token | Description |
|---|---|
| {$MERGE_DATE} | The date which merge document has been generated. |
| {$MERGE_DATETIME} | The date and time which merge document has been generated. |
| {$IN_TWO_WEEKS} | The date 2 weeks from today. |
| {$IN_THREE_WEEKS} | The date 3 weeks from today. |
| {$IN_FOUR_WEEKS} | The date 4 weeks from today. |
| {$due} | Displays the date in the format of: 15/08/2021 This token is also useful f you have Process Workflow Updates on Items turned off for your template. If Process Workflow Updates on Items is turned off, it will still calculate what the due date will be and it will appear in the letter even though it doesn't update the item. |
*NOTE: if you use {$due} (which is the Next Action Date) any FPN records with no due date will have the default date of two or three weeks set before it prints
It is also possible to add a custom date. For example
{"+35 days"|date_format:"%d-%m-%Y"}
This will output the date in 35 days, in the format Day-Month-Year (eg 30-10-2020). Contact Datalink for advise if an alternative date format is required.
Date Formatting
The output of non workflow status datetime fields can be formatted: For example
{$item.datePermitDeclined|date_format:"%d-%m-%Y %l:%M %p"}
will output the datetime as 11-10-2021 5:00PM
{$item.datePermitDeclined|date_format:"%d-%m-%Y %H:%M"}
will output the datetime as 11-10-2021 17:00
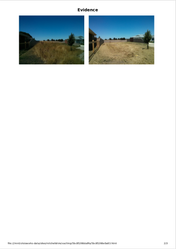
Adding a photos page if evidence exists
If we have any media attached to the record, this renders it on its own page.

{if $media}

  <!-- Page break and carriage return to position heading -->
  <hr />
  <br />

  <!-- Centre out heading -->
  <h1 class="center-text">Evidence</h1>

  <p>
    <!-- Loops on all media, creating a {$photo} mail mege token for each photo -->
    {foreach from=$media item="photo"}
      <!-- Here's how to add images - the class of "media" makes it a comfy size for printing, otherwise it would be massive -->
      <img class="media" src="{$photo}">
    {/foreach}
  </p>

{/if}
Adding Override Fields to your letter
There are some override fields available on the Fire Prevention Notice form that you can enter into you merge template to appear in your letter. As well as entering the information into the form fields, you will need to add the tokens for these override fields to your merge letter template.
Currently there are three override fields on the FPN form which are listed below along with the tokens you need to use for these fields for them to appear in the letter:
- Override Owner Details
- Override Property Number
- Override Location
{$overrideOwnerDetails}
{$item.overridePropertyNumber}
{$item.overrideLocation}
The Override Owner Details token should already exist in your template.
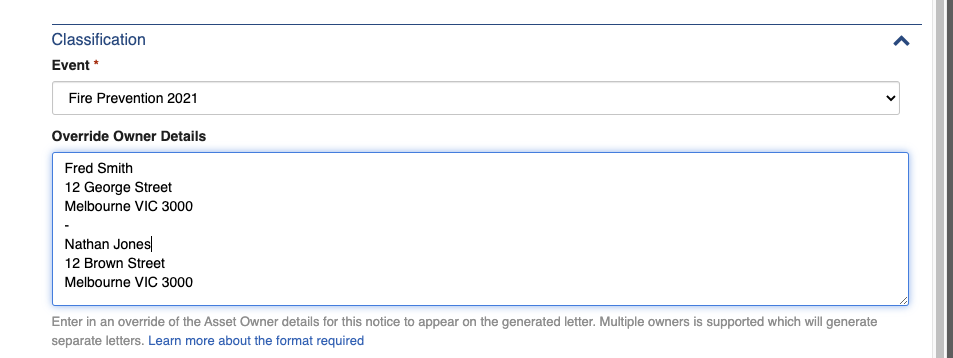
Multiple Override Owner Details
You can add multiple override owners into the Override Owner Details section of your Fire Prevention Notice. Each owner should be separated by a hyphen on a new line which will then generate separate letters for each override owner. Below is an example of how to add multiple override owners.
In this example two letters will be created, one for Fred Smith and one for Nathan Jones. The token {$overrideOwnerDetails} will automatically work with any multiple override owner details entered.
You many need to enter the below tokens manually if you want them to appear in the letter.
For the override property number field it would be best to create an if statement in your letter next to the "Property No." heading to display this field if it is entered, otherwise display the original property number. See below for an example:
Property No.
{if $item.overridePropertyNumber}
   {$item.overridePropertyNumber}
{else}
   {$item.Asset.friendlyCode}
{/if}
FRV Zones and Adding Conditional Advanced Searches to your letter
For advanced users who use CQL* terms in the Crisisworks' Search box, these searches can be added to your letter along with an "if" statement using an "if_cql" function.
For example you can query on items "within:frv" to display some wording for items that match that criteria and then items that do not meet that criteria to display something else.
You could also perform queries on items with certain tags such as "tags:dogs".
Anything you can perform a CQL search on in the Search box on your site can be used with this new function.
Since the new 2020 FRV Zones have been introduced, some different wording may need to appear in your letters for the items linked to addresses within the zone. If your site
has FRV Zones, once they have been imported into your site you simply need to add the following to your letter:
{if in_cql($item, 'within:frv')}
   Display some text here for items within the frv zone
{else}
	Display some text here for items outside the frv zone
{/if}
An example of displaying certain text for a tag is below:
{if in_cql($item, 'tags:dogs')}
   Display some text here for items that have the tag 'dogs'
{else}
	Display some text here for items that do not have the tag 'dogs'
{/if}
*CQL is Crisisworks Query Language search tips for more information, for the specific search terms available for FPN, select the "SearchDictionary" link under the search box in the FPN datagrid.
Additionally to this, some counters have been created which can be accessed in the merge template. You have the option of either using the in_cql function above or a new function called in_counter which references counters. The advantage of this is that one of the counters refers to items on the FRV Boundary.
You can call these counters by using a function in your template called in_counter and passing through the id of the counter. The available counters are:
INZONEFRV - whether the item is in the FRV zone.
INZONECFA - if you have a CFA Zone loaded into your system it will use this otherwise it will default to all items not within FRV.
FRVBOUNDARY - whether the item is on the FTRV Boundary

To use the counter function you can add it like this into your template:
{if in_counter($item, 'INZONEFRV')}
  Display some text here for items within the frv zone
{elseif in_counter($item, 'INZONECFA')}
    Display some text here for items within the CFA Zone
{elseif in_counter($item, 'FRVBOUNDARY')}
   Display some text here for items on the FRV Boundary.
{/if}
Reference
Margins used in following example
These Margins give space for the letter heads logo The Html text below has extra line breaks to allow for these margins used here | 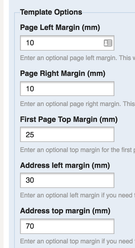 |
CSS to be included in the next code release
This should go into the next release. I’ve split this from the rest of the CSS. This section will then be removed from this guide.
table td {
  vertical-align: top;
  text-align: left;
}

img {
  padding: 4mm;
}

br {
  clear: both;
}

hr {
  clear: both;
}
CSS styles for the "Additional CSS" field
The following minimalist CSS rules gives us pretty decent control over a notice document — this can be copied and pasted into the "Additional CSS" form field when creating new mail merge templates.
Full sample template
The following is the full sample template used for the screenshots above.
How to change the printed image sizes
img.media {
    width: 70%;
}
img.media {
   width: 500px;
   padding-top: 10px
}
img.media {
    width: 20cm;
}
How to use your own custom descriptions for non compliant items
Remedy the following (your text here):
<ul>

{if isset($item.createClearanceZone)}
<li>Create a 4m wide by 4m high clearance zone along the driveway by lopping branches & trimming bushes to allow access for emergency service vehicles to your property </li>
{/if}
{if isset($item.createFirebreakBuildings)}
<li>Create a firebreak around any buildings, structures, haystacks, flammable liquid store or derelict vehicles, to a maximum height of 100mm, The firebreak must have a minimum width of {$item.createFirebreakBuildingsMinWidth} </li>
{/if}

{if isset($item.createFirebreakPerimeter)}
<li>Create a firebreak around the perimeter of the whole property, to a maximum height of 100mm. The firebreak must have a minimum width of {$item.createFirebreakPerimeterMinWidth}</li>
{/if}

{if isset($item.createFirebreakRoadside)}
<li>Create a firebreak along the roadside boundary of your property, to a maximum height of 100mm. The firebreak must have a minimum width of {$item.createFirebreakRoadsideMinWidth} </li>
{/if}

{if isset($item.cutGrass)}
<li>Cut all grass, weeds and undergrowth on the whole block, including fence line, to a maximum height of 100mm </li>
{/if}

{if isset($item.cutGrassFence)}
<li>Cut all grass, weeds and undergrowth on the fence line, to a maximum height of 100mm </li>
{/if}

{if isset($item.maintainClear)}
<li>The defined area must be cleared to the standard specified and maintained in this condition for the duration of the declared Fire Danger Period </li>
{/if}

{if isset($item.removeFuel)}
<li>Remove excess fine fuel e.g. cut grass, leaves, bark, twigs from whole of property </li>
{/if}

{if isset($item.removeHeavyFuel)}
<li>Remove or isolate excess heavy fuel e.g. branches, prunings, dead vegetation from whole of property</li>
{/if}

{if isset($item.removeMaterial)}
<li>Remove all flammable materials, including wood, grass and other greenwaste, from around or overhanging your house, outbuildings or neighbours buildings, to a minimum distance of {$item.removeMaterialMinDistance}</li>
{/if}

{if isset($item.removeMaterialsProperty)}
<li>Remove all flammable materials, including wood, grass, prunings and other greenwaste from the whole of the property</li>
{/if}

{if isset($item.removeWaste)}
<li>Remove all accumulated general waste identified as a fire hazard (refer photos)</li>
{/if}

{if isset($item.attachMap)}
<li>Conduct work as shown on the attached map</li>
{/if}

</ul>