Adding and working with resources/service providers for recovery cases
As a Crisisworks administrator you can modify the list of recovery service providers that are used in the recovery form. The service providers are actually resources in Crisisworks.
You can set up resources to automatically notify users when a resource/service provider is added/updated on a recovery service task or a request, this is done when a user belongs to the same organisation as the resources and has their notifications settings enabled. See section How to link a user to resources and enable notifications below
On this page
Bulk create recovery service tasks
When working with large data sets sometimes we want to find multiple records and then add bulk create recovery tasks in one step.
To bulk create recovery service tasks
- Filter the list for the cases you want to bulk add recovery service tasks for
- Bulk select the records with the big tick above the list on the LHS, or individually select the items you want to create tasks for
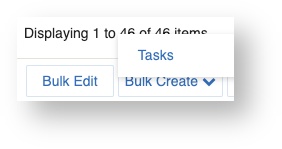
- Select the Bulk Create button from the bottom of the case list, then select Tasks
- On the next screen choose the recovery service task and optionally add the resource/service provider, then select the Bulk Create button.
Bulk editing recovery service tasks
If you have many recovery service tasks that you wish to apply, for example, the same due date to, or assign the same service provider, you can apply these changes in bulk.
- Select Needs & Tasks from the Recovery menu
- Filter the list for the ones you want to bulk edit
- Bulk select the records with the big tick above the list on the LHS, or select the few items you wish to bulk edit
- Select Bulk Edit from the bottom of the list
- On the next screen set the service provider and other details
- Select Make Changes
Adding a new resource/service provider
As a Crisisworks administrator:
- Select settings from the Administration menu
- Select Resources
- Make sure the resource/service provider is not already in the resources list by doing a couple of searches in with the magnifying glass, to prevent duplication.
Press New Resource from the top RHS of the screen
- Fill in the form
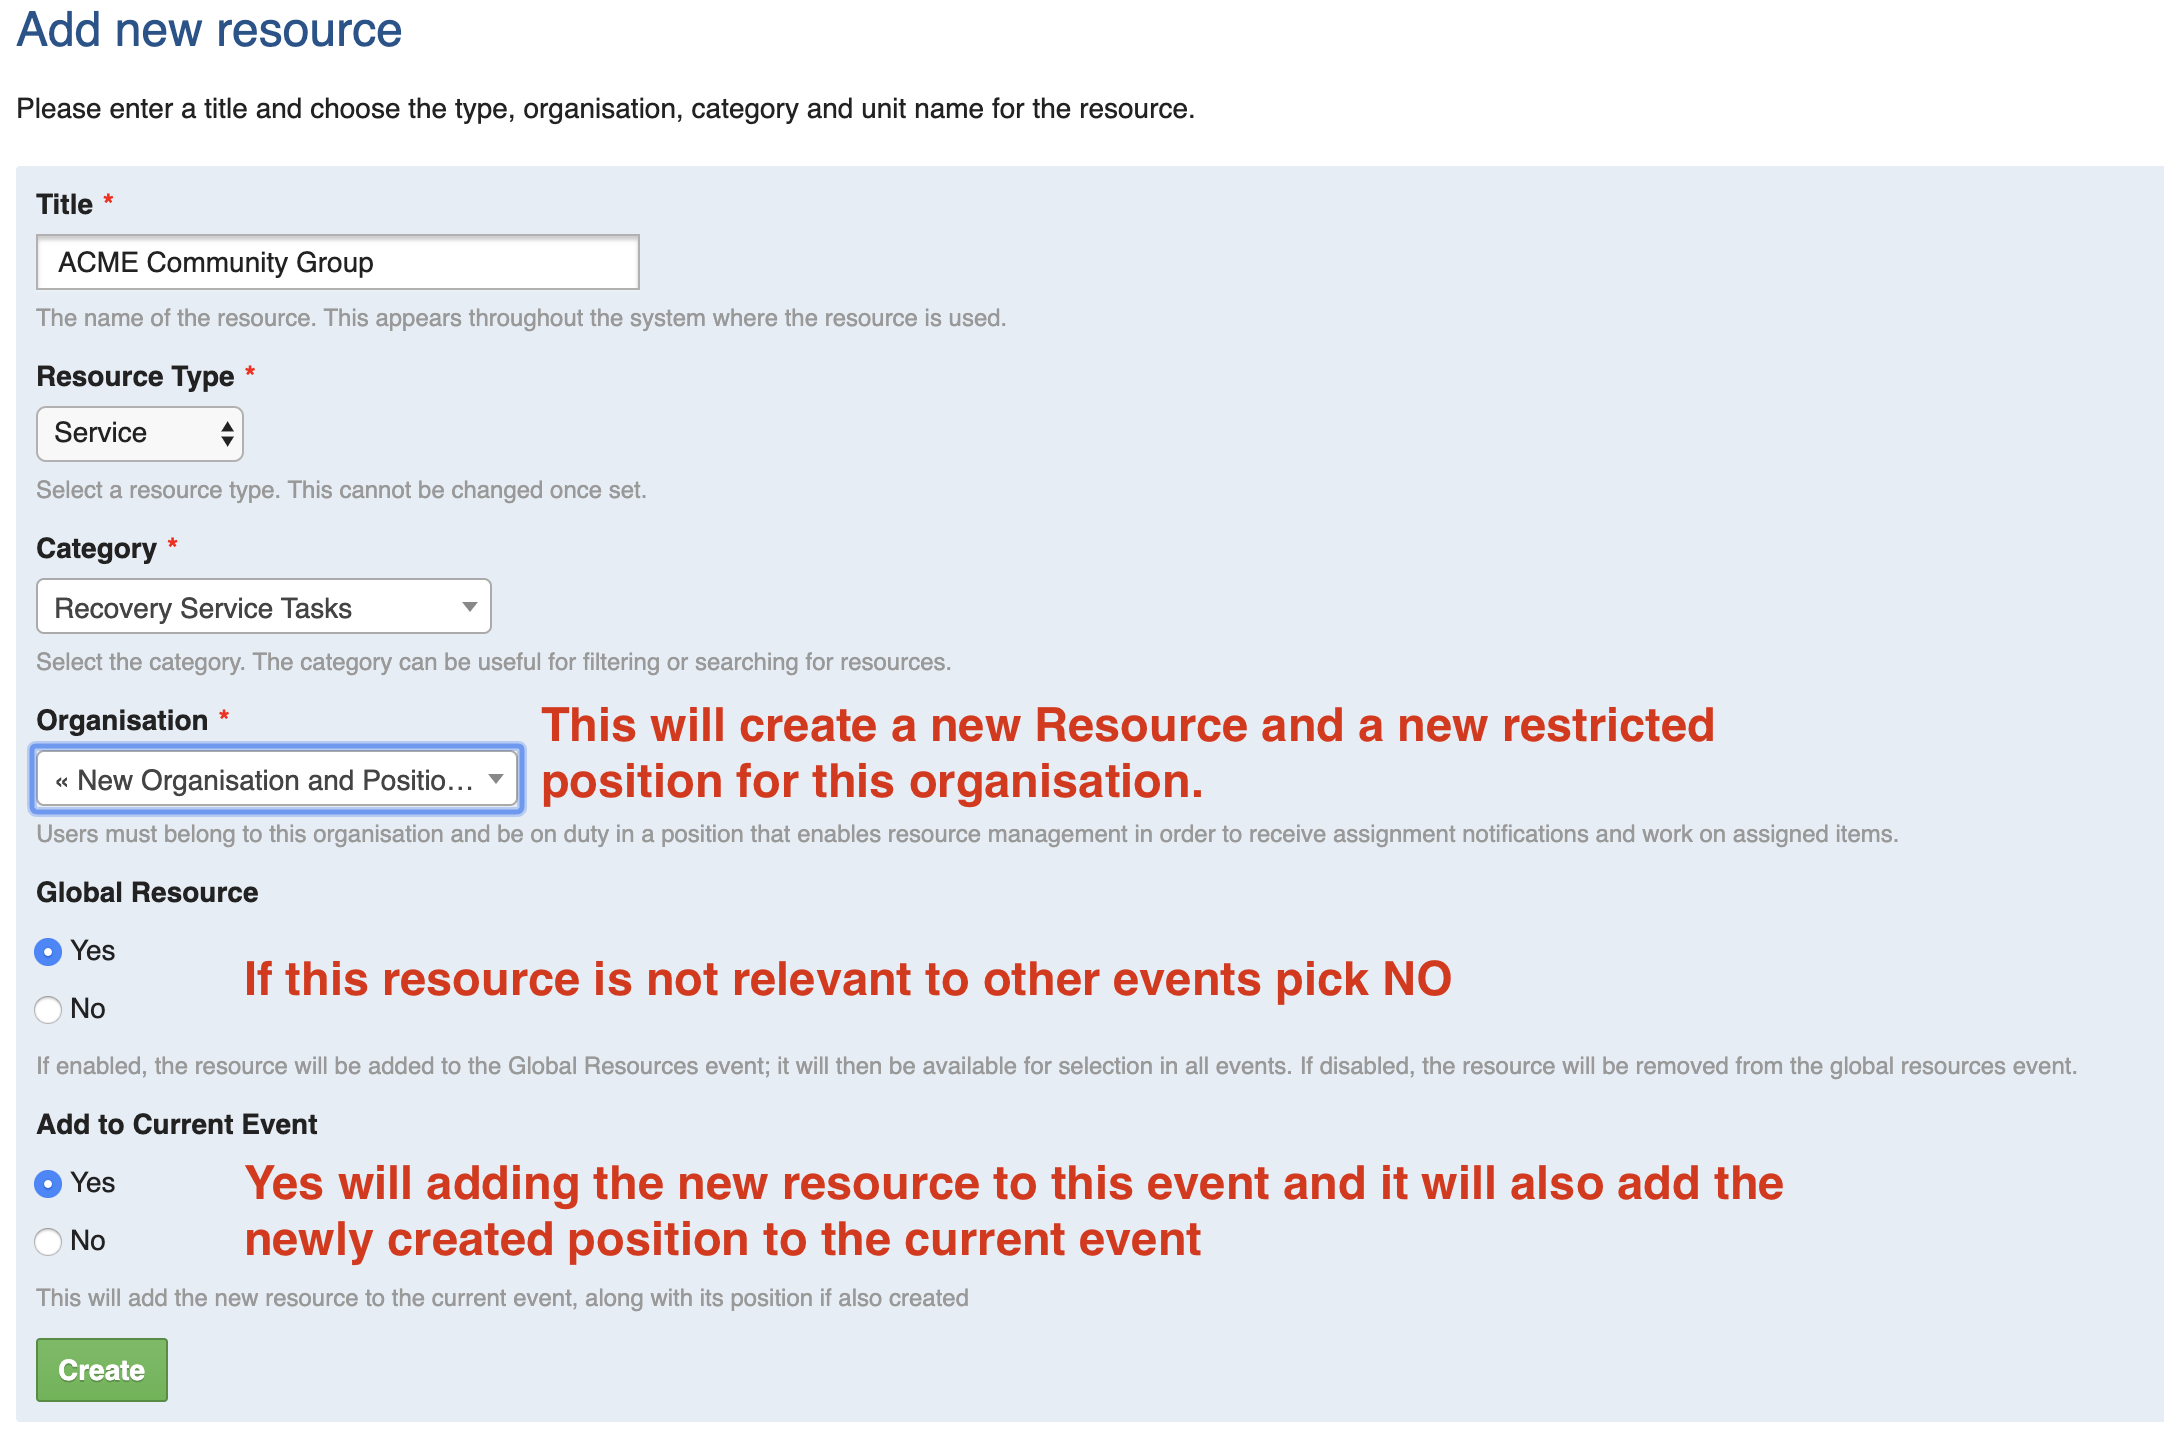
- Set the Title eg "ACME Community Group"
- Set the Resource Type, most recovery resources will be a "Service"
- Set the Category, to be "Recovery Service task" (if it will only be used for recovery)
- Select the Organisation or pick "New Organisation for resource"
- If this is linked to your own primary organisation, we recommend you create a new organisation like "Council - Misc Dept"
- This will prevent most users getting notifications when the records are assigned or updated (see section How to link a user to resources and enable notifications
section below)
- This will prevent most users getting notifications when the records are assigned or updated (see section How to link a user to resources and enable notifications
- If this is linked to your own primary organisation, we recommend you create a new organisation like "Council - Misc Dept"
- Set Global resource to "Y"
- If this resource is for the current event only, then pick "No" otherwise leave the default of "Yes" (You can change this at a later stage).
- if you do select "No" please manually add this resource to the event(s) after you have created it see Adding/Removing Resources from an Event
- Set to current event to "Yes"
- This will also add the newly created position to the current event as well.
- Press Create (this takes you to page two)
- On the second screen you can optionally add
- an existing contact for this resource, so you can have their phone number etc linked to many resources
- you can add the unit and rate / costs if applicable
- Press Save
- Note : there is now a new position called "Contractor" from the new organisation eg ACME Community Group, you can rename and edit this position if you like
How to make a resource only show for a single event
If a resource is a not a global resource it won't be available for selection when editing the item unless it is manually added to the event(s) you are working in.
If the resource is a global resource, then edit it and make it a NON global resource, then add the resource to the current event.
See Adding/Removing Resources from an Event for further help with managing event resources.
How to link a user to resources and enable notifications
If you want users to receive notifications for assigned recovery tasks or assigned requests, or if you want them to login to see their records you will need to create a user account for them.
Even if they will not log in, a user record needs to be present for them to receive automated notifications.
Users are not directly linked to resources, they are instead linked the resource's organisation. This gives you the ability to have multiple people receive notifications and have the ability to edit records based on the resources assigned to their organisation.
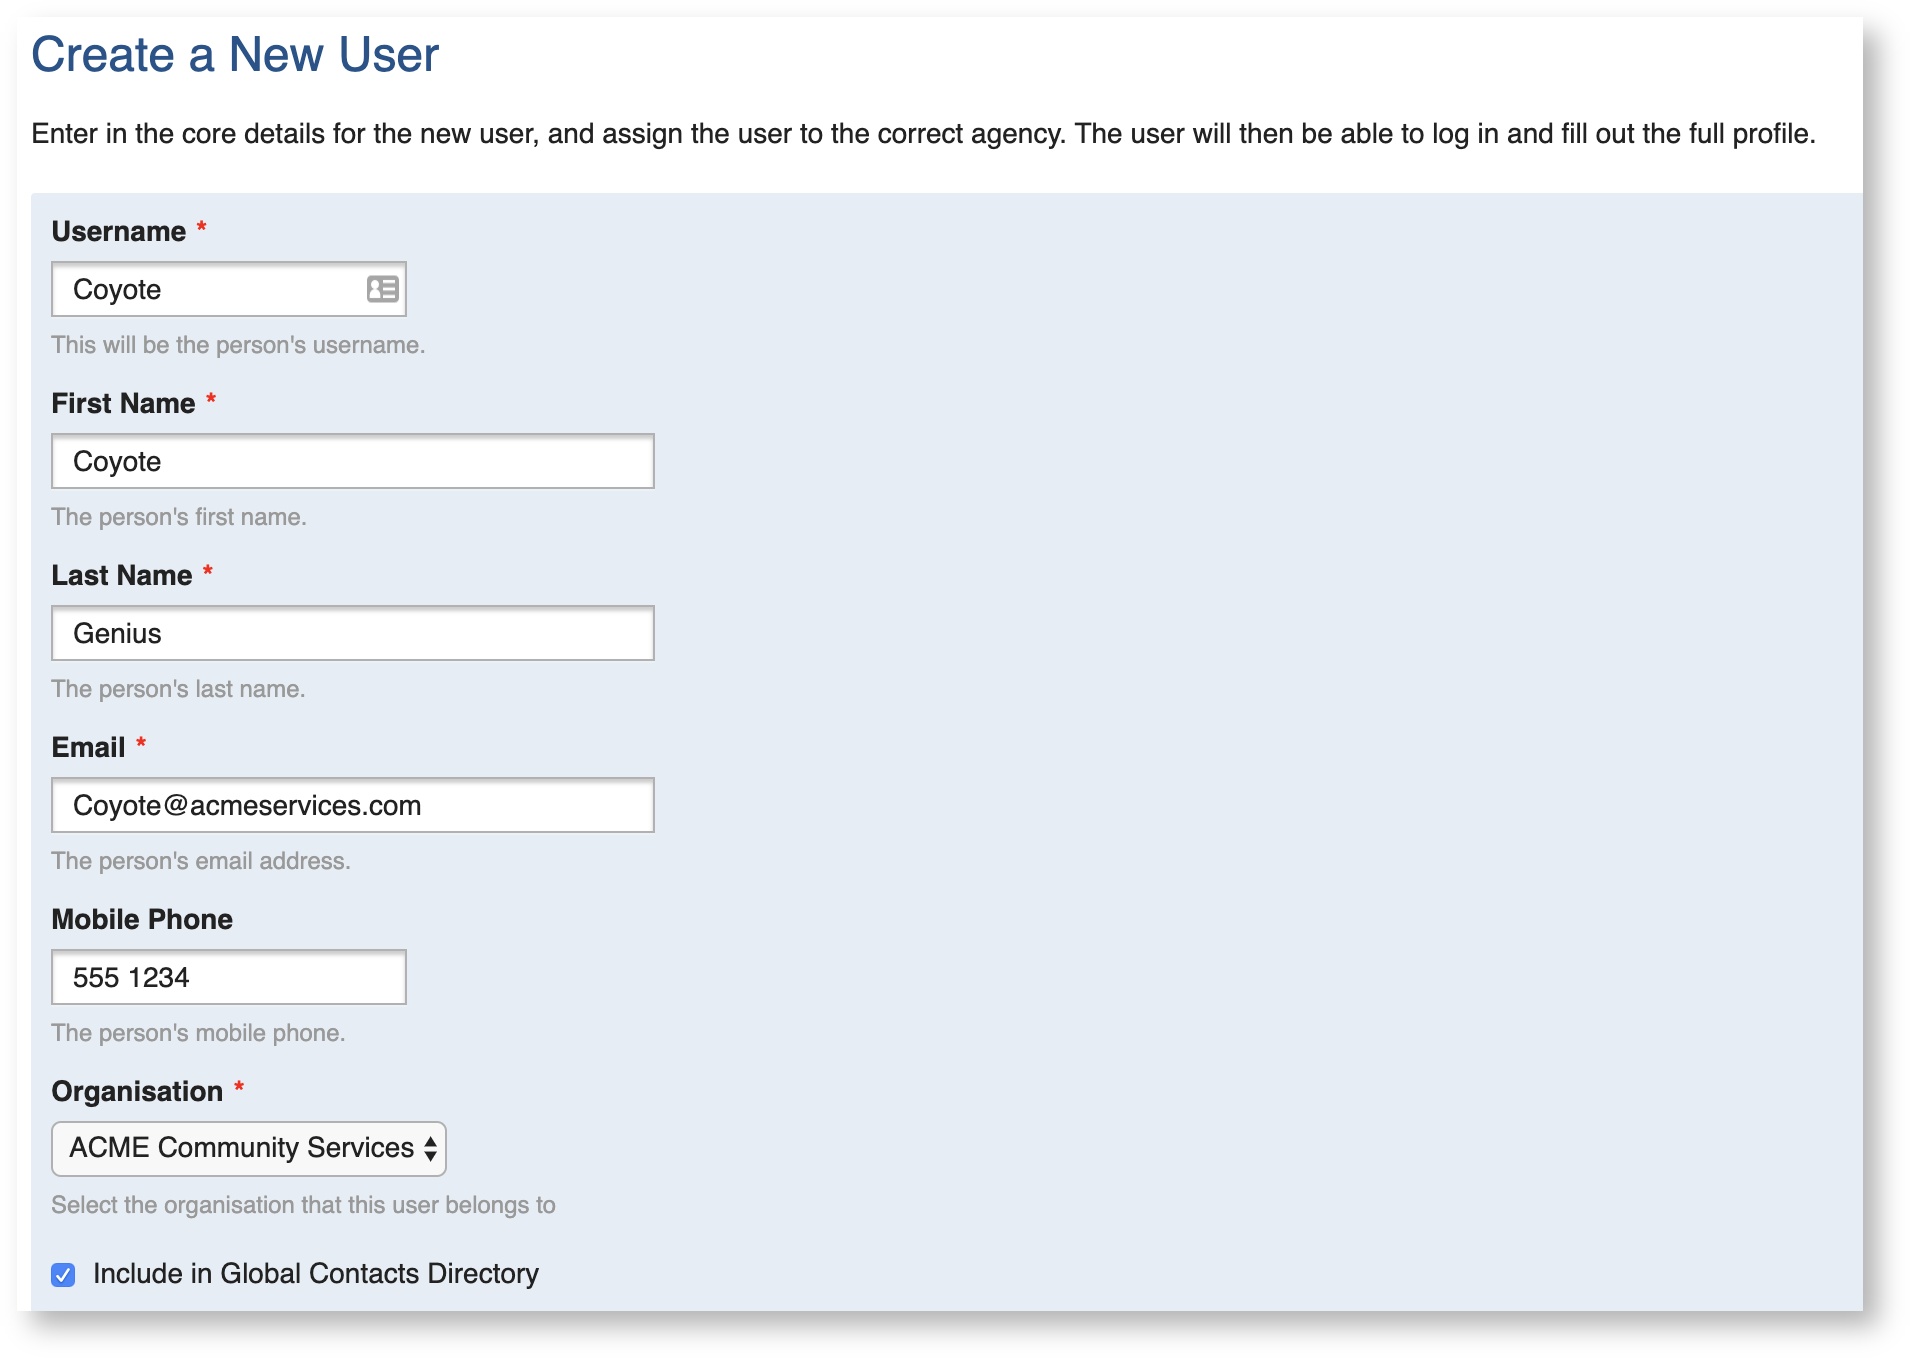
Extending from the example above, for ACME Community Group, we will add a user that belongs to the same organisation as the resource.
To create a new user, Administrators, should select the Users option from the Administration menu and select the new user button.
The new user needs to be added to the same organisation as the resource, as shown below.
AiAdd the position such as the ACME Community Group::Contractor position that was created in the example above .
Once you have created their account, you can edit their user record to enable their notifications
If you do want this user to be able to login and see the records assigned to them you can create a restricted position for them, see the next section.
Adding a restricted position for recovery contractors
You may not need to create a position for you resources, as a "contractor" position is created with a new resource when you choose the option to create anorganisation. you may only need to rename it (if you like)
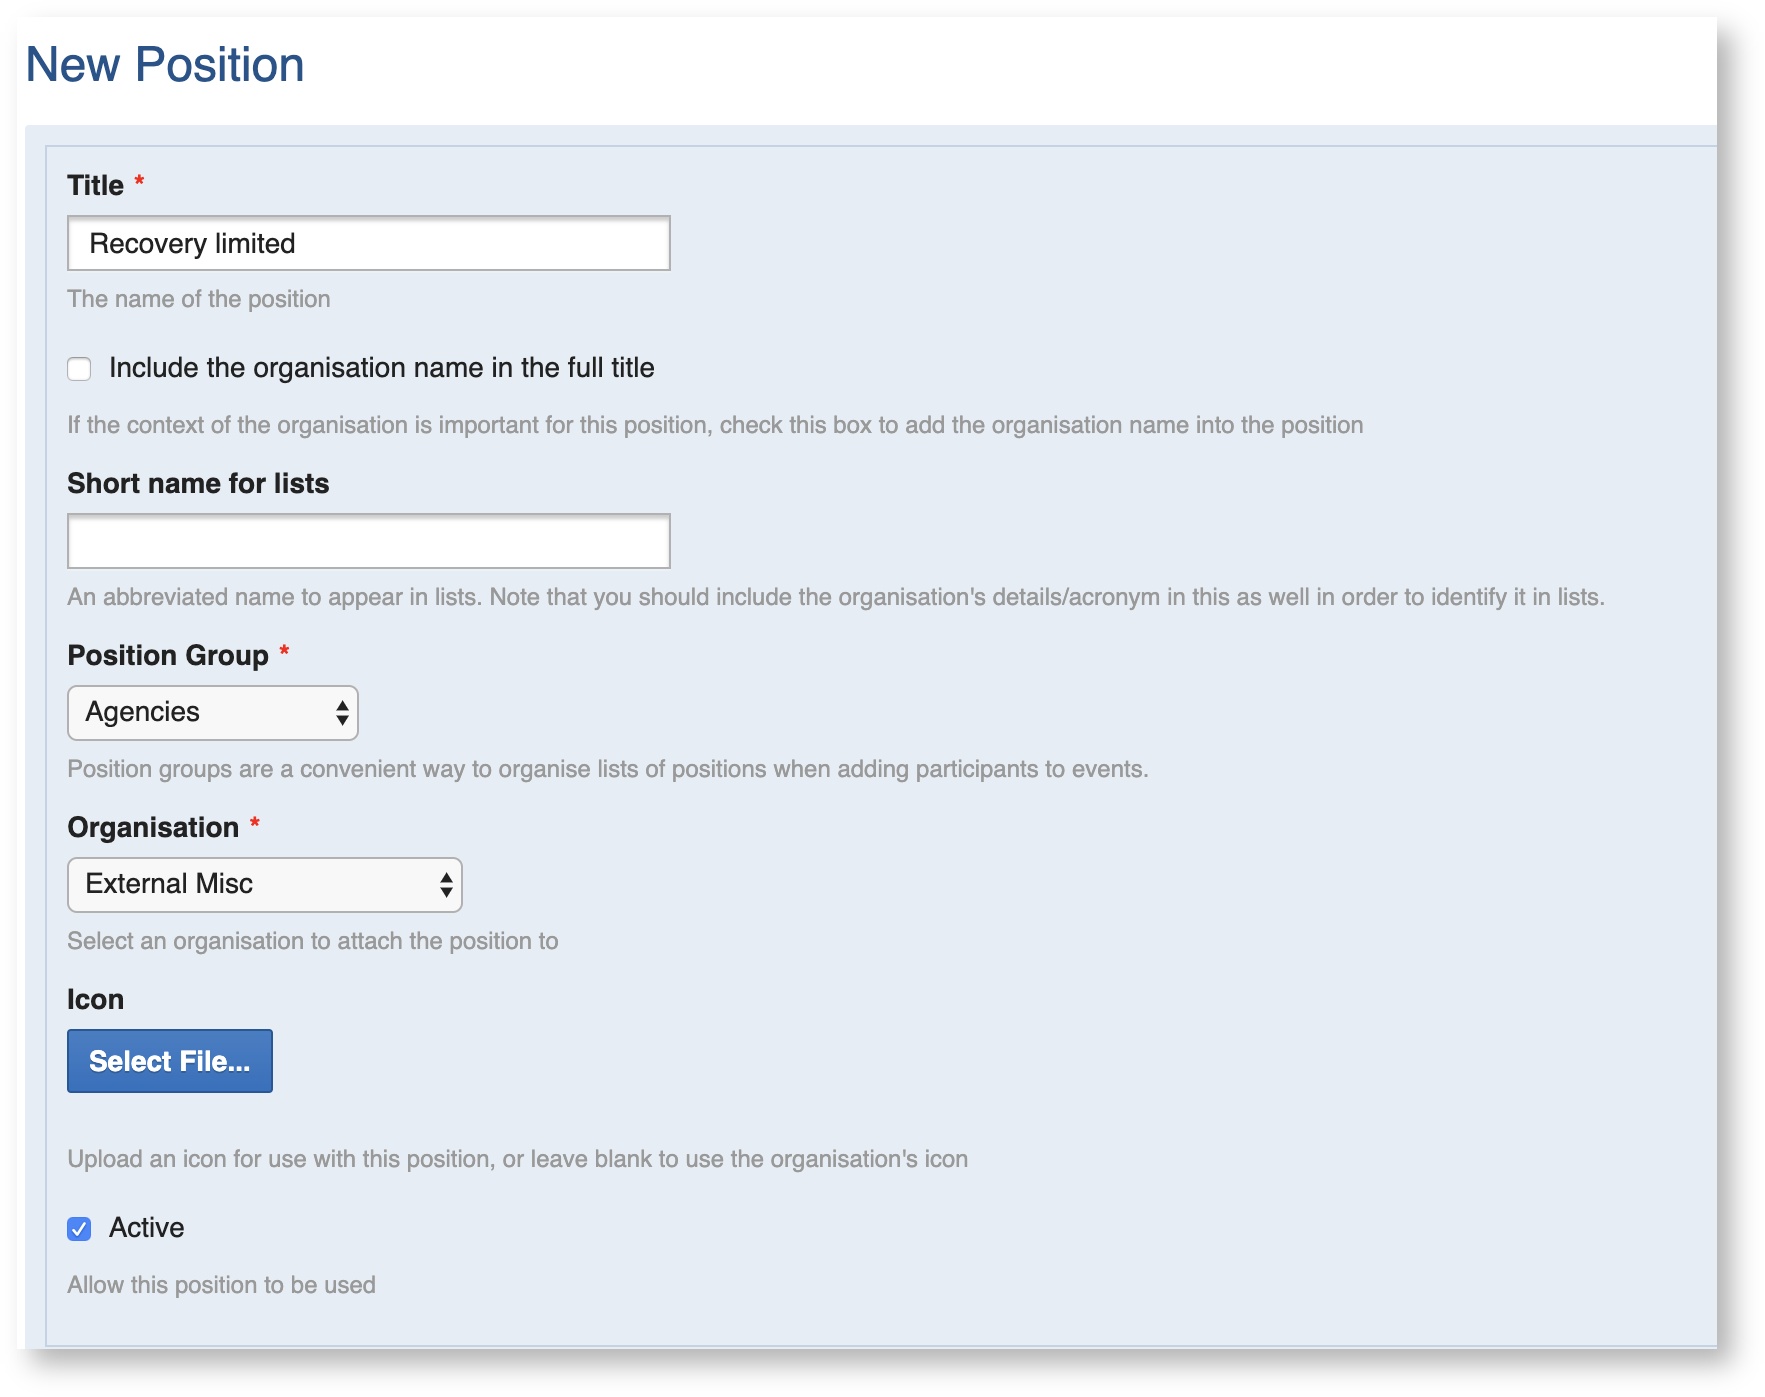
If you want to create a position for all recovery contractors you can either create a generic one, for example, "Recovery Limited", or you can create a custom position for each of the major contractors. Creating a position for each contractor will allow you to manage them separately. This is important if you are working in the response phase of an event and want to assign requests.
If you are creating a generic position you can link the position to a generic organisation rather than a specific one (as you can see in the below screenshot) however this is not preferred option.
As a minimum, add this one security policy allow users to login and view/edit items assigned to them.
More information about resources
see Working with Resources for information on
- Adding/Removing Resources from an Event
- Editing a Resource
- Adding a Resource
- Linking Contacts to Requests
- Changing the unit rate for used resources
- Deleting a Resource
- Resource Form Fields


