...
To enable or disable public submissions
To enable submissions:
Add the Relief Public User position to the event
Put the special
__PUBLIC__user on duty to the Relief Public User position
To disable subissions
Take the
__PUBLIC__user off duty for the Relief Public User position.
Configuring the public form help text
...
There are free services on the internet to generate QR codes. An example of one of these from “QR Code Generator” is shown below (another site which does not require registration is “QR Code Monkey”). Google Chrome now also natively supports QR generation for web pages (see Share pages with a QR code). Note: these are third party services not related to Crisisworks and therefore we cannot support their use. However if you require assistance the helpdesk can generate a QR code for your Crisisworks.
...
The list of service categories are maintained in a lookup table that can be managed by Crisisworks administrators.
For each service that is required, click Add New
Select the Category of service to be performed (e.g. Counselling, Emergency Shelter)
Specify the Provisioning Status — typically this is Requested in the initial entry.
Specify a Priority
If the service needs to be completed by a certain date, enter a due date
Enter some details to summarise the service requirement
You can assign a service provider at the time of record creation if this is known. Otherwise, leave the Assigned Service Provider field blank.
...
If you want to accept public submissions, you also need to
add the Relief Public User position to the event.
put the public user on duty for that position.
The public submission process is controlled by the __PUBLIC__ user’s ability to submit relief registrations.
To enable public registrations, you need to perform the following action:
Go to Administration > Users
Edit the
__PUBLIC__userCheck that the user has the position Relief Public User, or add it if it is missing.
Now click Manage Duties on that user’s record
Put the user on duty as the Relief Public User position for the event you’re using for Relief Registrations.
Sending Bulk Communications to Relief Registration Contacts
Crisisworks allows you to send an email and/or SMS to the main contact of one or more Relief Registration records. Follow the steps below:
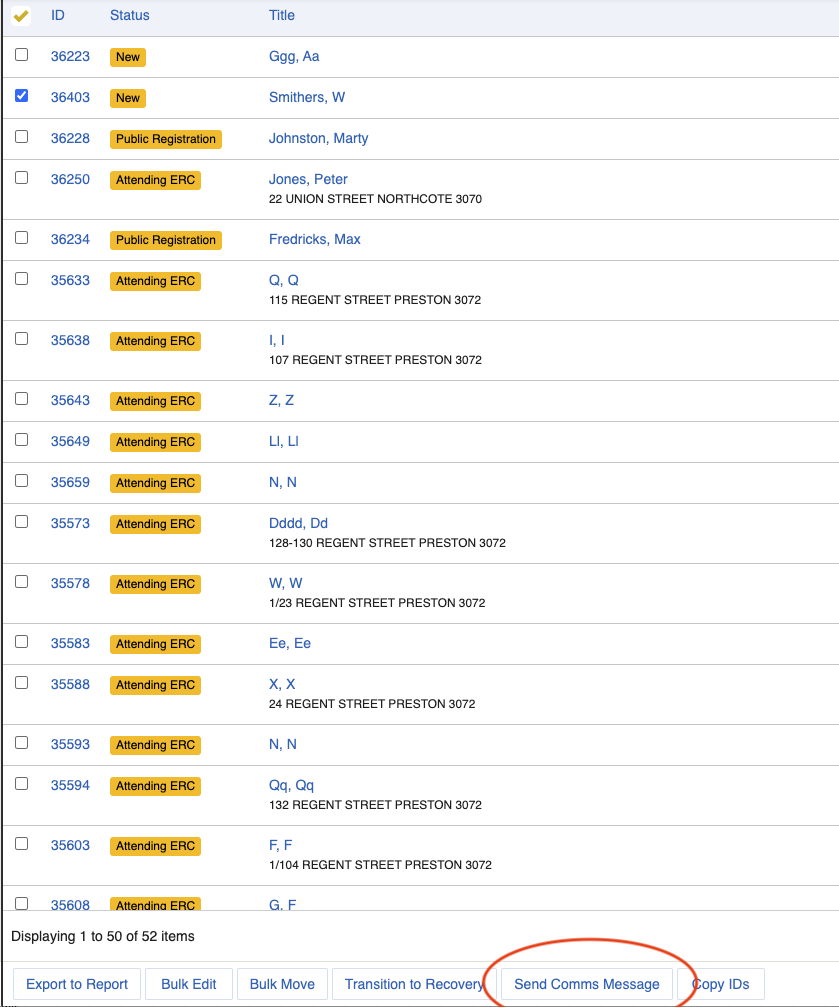
Select one or more Relief Registration records from the datagrid.
Click the Send Comms Message button at the bottom of the datagrid (see image below). This will take you to the New Comms Message screen.
Leave the “Empty Message” option in the template drop-down list unless you have previously set up a template for Relief Registration messages.
Enter a relevant topic - this acts as the title of the message that will appear in the Comms datagrid. This can be the same as the Subject of the message but it does not need to be.
Select the Formats you wish to send the message in - Email and/or SMS.
You can optionally add Tags to help you classify this message to find later on with other comms messages.
Click the Create Message green button. This creates a draft message and will not send your message yet.
On the next screen, you can choose to view this new draft or return to the datagrid or view all drafts
To continue editing your message, click on the View Item button. This will take you to your draft message.
Click the Edit button to make changes to your message.
The recipients for your message should already be filled in from the Relief Registration records you selected. You can search for other recipients or enter manual email addresses into the Recipients field as well if you need to. (see image below)
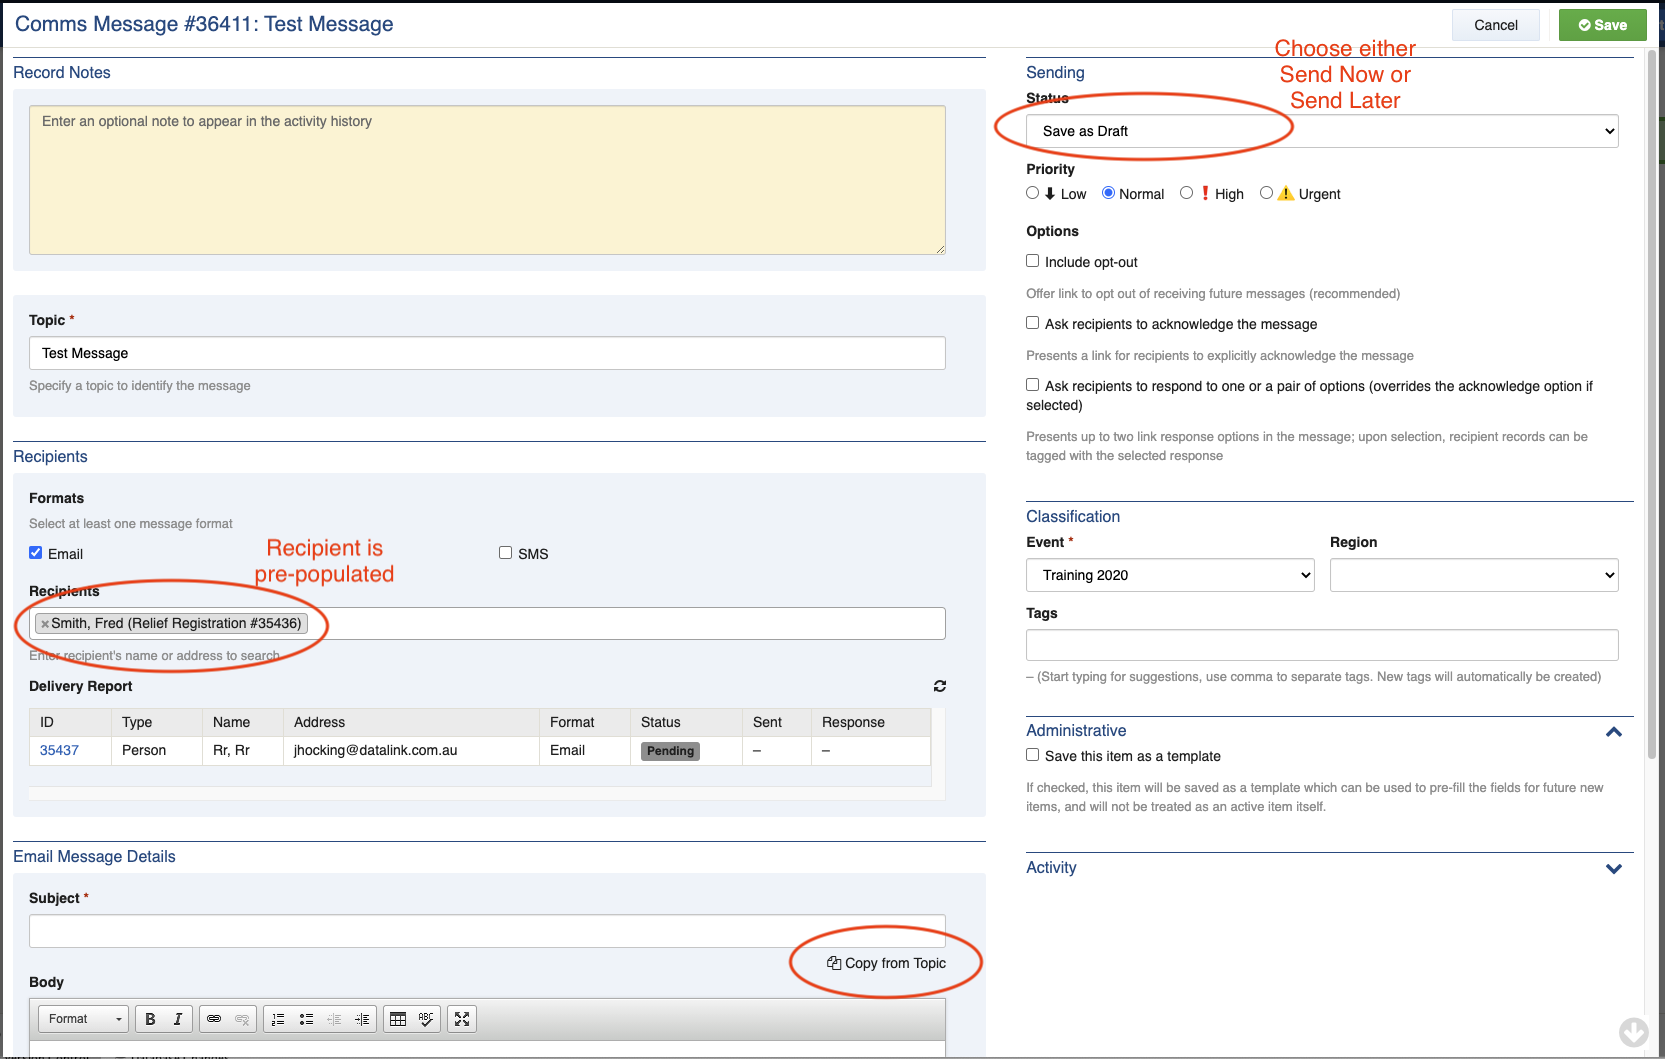
Under the Email Message Details section, enter a subject for your message. Note - if you want this to be the same as the Topic you previously entered, you can click on the Copy From Topic link that appears under the Subject box.
Enter the main message details into the Body area. You can also optionally upload files which will be sent as attachments to the emails sent. You can do this by dragging the files into the Add File area under the Attachments section or by clicking on the Add File button to select the files from your computer.
In the top right-hand side, update the status to Send Now to send the message as soon as you save the message, or alternatively, you can choose to Send Later to specify a later date and time for the message to be sent.
You can optionally select any of the checkboxes under the Options area or you can leave these options blank.
Ask recipients to acknowledge the message is a very useful feature you may wish to use
Click Save. If you have selected the Send Now status, your message will be sent immediately (within the next 30 - 60 seconds)
Click the Back to Datagrid button to be taken back to the Relief Registration area.
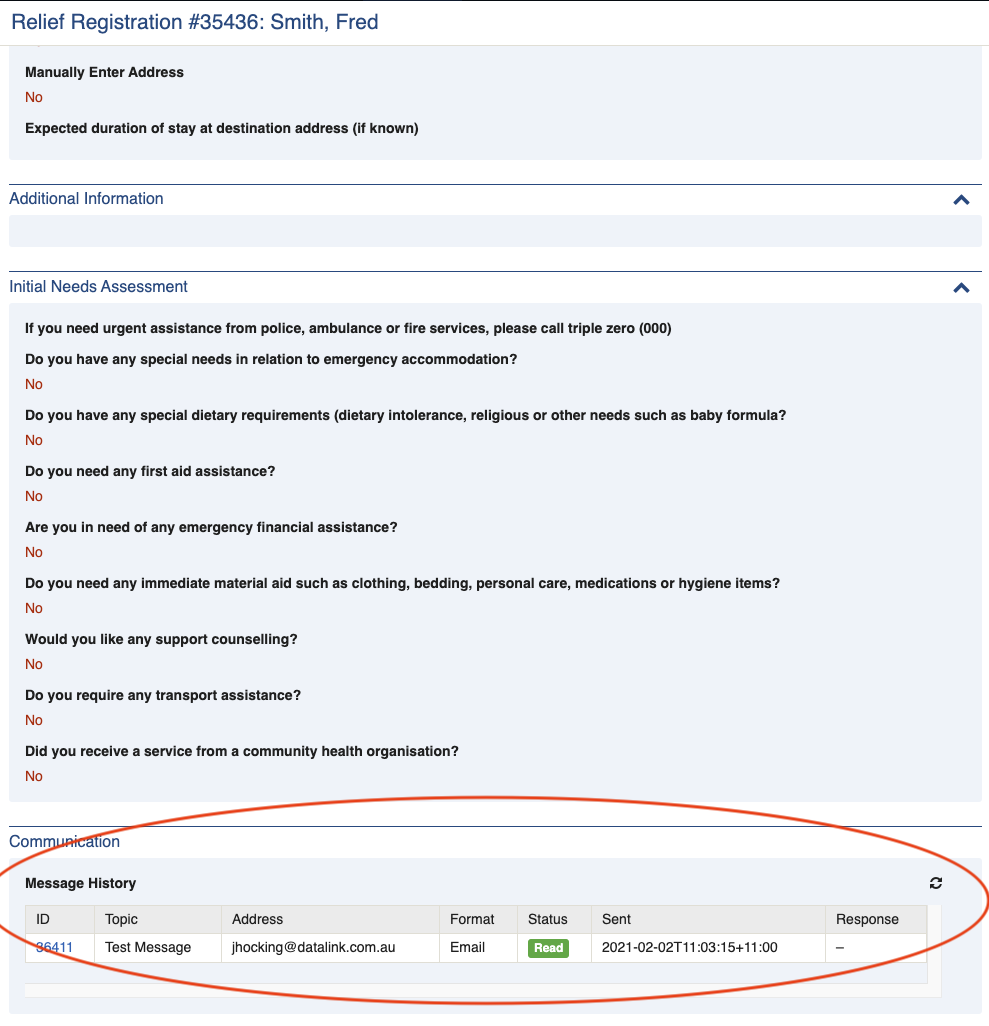
You can now click on the Relief Registration records to view the status of the messages. This will appear at the bottom of the Relief Registration record under the Communication area.
| Info |
|---|
If any messages fail to be sent, they will appear in a Failed or Not Sent counter on the left-hand side of the Relief Registration datagrid (see image below) |
...