Overview
The Crisisworks Fire Prevention Notice module provides a way to report and track Fire Prevention Infringements, both in the field and in the office.
...
The initial set-up of the Fire Prevention Notice module involves the creation of the field survey form, the import of property data, and work to determine how to import data back into your Council business systems.
NOTE: It is important to determine the correct property asset IDs that will be used in Crisisworks, which will match with your organisation's own asset codes. For example, some Victorian Councils use "parcel number" while some use "prop num" (property number). Before importing your own asset data look at the asset via administration menu → assets and review the property data to see if it is correctly configured, look at the "Code" field, this is your own asset ID.
If this is not correct, contact Datalink support.
Define your inspection form
...
Multiple asset types can be configured for use in the same form, for FPNs both Property and Parcel data could added as part of the initial setup by Datalink.
To the import data: Goto the administration menu → settings → import data
- This screen has a link to your own site's import details, such as field name and field order.
Supported Formats
Crisisworks can support the following import formats:
...
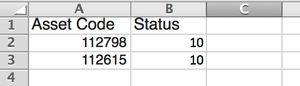
If you have a list of properties that you would like to inspect, you can create them in the web browser one at a time or alternatively, you can perform a bulk import from a CSV file. The file only requires two columns of data which is the property ID and status (10 is for 1st inspection required, 20 is for Hazard exists)
The import items, go to Administration -> Settings -> Import Data. Here, you can choose to import FPN items from a csv site and upload the relevant file.
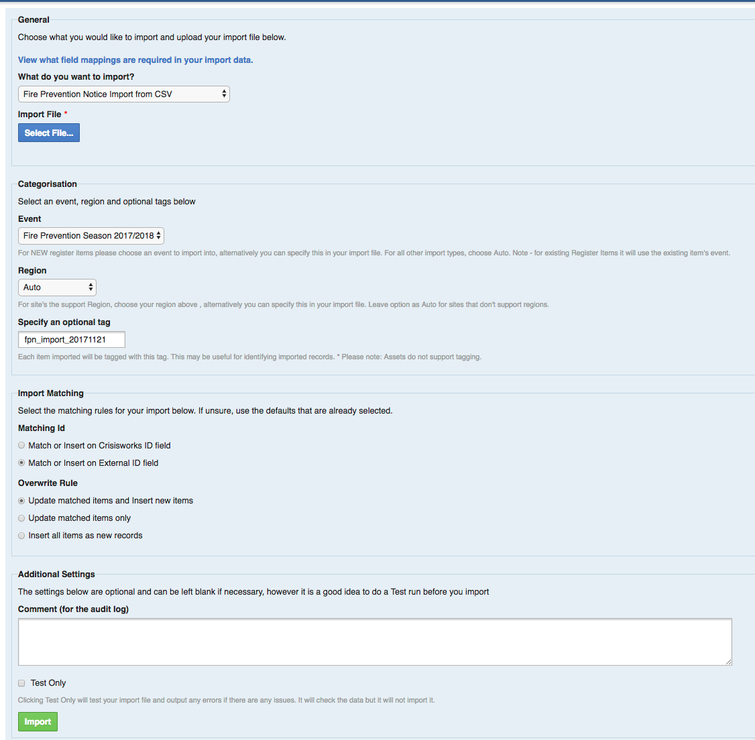
When uploading a file for the first time, it is a good idea to select the "Test Only" option. This will output any errors that may be present in your data file without making any changes to Crisisworks. This allows you to address any errors before proceeding with the actual import.
Once imported, records can be assigned to officers in bulk (see section below).
...
If you intend to use the built-in Crisisworks letter generation system, you will need to import the owner details first. The file uploaded is for postal correspondence
As of Oct 30th 2018, an improved and simplified approach has been introduced, prior to version 4.19 property owner details are imported together with the property asset data.
Here is a demonstration CSV file.
View file name Asset Contacts upload demo.csv height 150
...
- Create an Organisation such as “Jims Mowing”.
- Create a Resource. When creating the resource, you must choose the Organisation you just created and make sure the resource is set to the “Fire Prevention” Category towards the bottom of the form. The resource will have the costs and type of service they offer such as “Jims – Large block clearing” and “Jims – Branch removal”
- Setup the Contractor position for the new Organisation. A Crisisworks Administrator (or Datalink) will need to do this. For example "FPN Contractor" at Jim’s Mowing. When setting up the new Contractor position, Administrators should choose the Security Policy " Fire Prevention Task Assigned-to-resource-only Access" to restrict access to tasks only assigned to them.
A Crisisworks Administrator can then create the Contractor user account. When creating the user, Administrators need to choose the Organisation just created (ie Jims Mowing). Administrators also need to choose the Position for this user. In the Position tab, a position should now appear called “FPN Contractor at Jim's Mowing”.
...
| Field | Description |
|---|---|
| Letterhead File | You have the option of uploading your company letterhead into the template. This will then be added to each PDF letter generated. Please ensure it is in PDF format. Click on the Select File button under the "Upload an optional letterhead file (PDF)" heading to upload your letterhead. |
| Letter Contents | This is where the HTML for your letter will go which will be converted to one or more PDF letters when you generate the merge from the FPN notice. You can simply edit this HTML to suit your needs. You must ensure all HTML is kept inside the <article> tag for it to be formatted correctly. Below are some basic HTML tags you can use in your content. In here you can add tokens which will be replaced with the FPN notice information. For example {$item.id} will be replaced with the item's id number (ie 54). You can click on the "View available tokens to add into your letter content" link to see the tokens you can add inside the HTML text box. |
| Page Left Margin (mm) | The left margin is how much space is created on the left-hand side of your letter before the content begins. This will default to 20mm. |
| Page Right Margin (mm) | The right margin is how much space is created on the right-hand side of your letter. This will default to 20mm. |
| First Page Top Margin (mm) | This is how much space to appear at the top of the letter on the first page before the text begins. Depending on the size of your letterhead, you may need to move the text up or down the page to format nicely with your letterhead. If you find the content overlapping your letterhead, then increase the size of the top margin. This will default to 30mm. |
| Address left margin (mm) | If you wish to send your letters in a window faced envelope, you can use the <address> tag in HTML and format where the address will sit on the page so that it appears inside the window face of the envelope. The Address left margin is how much space will appear on the left-hand side of the address. This will default to 25mm. |
| Address top margin (mm) | If you wish to send your letters in a window faced envelope, you can use the <address> tag in HTML and format where the address will sit on the page so that it appears inside the window face of the envelope. The Address top margin is how far down the page the address will appear, This will default to 4.2cm. |
| Additional CSS (optional) | This section should only be used by Advanced Users that know CSS. For example, if you wanted all of the text in your document to be blue, you can enter font-color: blue inside this box. |
| Show Page Header in PDF? | If selected, the page header displaying the date will appear at the top of each PDF page |
| Show Page Footer in PDF? | If selected, the page footer displaying page numbers and the file's URL will appear at the bottom of each PDF page. If removed it will only show the footer on the last page. |
...
View Detailed documentation for HTML merge letter templates
Basic HTML Tag examples
Below are some basic HTML tags that you can use in the letter content area:
...
Sample HTML with accompanying CSS is available at the bottom of the Detailed documentation for HTML merge letter templates.
Word Template
The letter template is a standard Microsoft Word document containing your letterhead, signatures etc with variables inside which will be replaced with the data from the record, this is a sample snippet of a merge file. (It does not support images or signatures from the user preferences file, use the HTML feature for these)
...