| Table of Contents |
|---|
Overview
Police Users interact with the VPR to query across all local registers in the event of an emergency (for example to create evacuation reports etc).
The following 6 minute video shows how to use the key functions within the system.
| View file | ||||
|---|---|---|---|---|
|
It may be useful to watch the Agency User Overview video for a general overview of how funded agencies work with the system.
Access
Police users are managed by VicPol, a MERC or REMI can organise a new police account.
Browsing and Querying Registers
This section covers the act of querying the registers to find vulnerable persons (VPs) that match your criteria.
There are several different methods to query the registers.
Queries generally fall into three types:
- Browsing - generating general results based ad-hoc,
- Filtering - generating precise results based on specific known criteria, and
- Counters - pre-designed filters designed to quickly access data.
Browsing the register
Browsing the register allows you to explore the map and view vulnerable persons with geographic features.
- Using the map to Pan and zoom
- Using the Find tool to focus the map on a specific point/location
Using counters
- Using counter links to access pre-set filters
- Within your LGA
- Proximity and local LGA using your location with a GPS-enabled device
Filtering
- Within Current View
- By Geographical Area
- Radius from a Point
- Polygon
Filters enable you to select a group of VPs to work with based on the criteria you set.
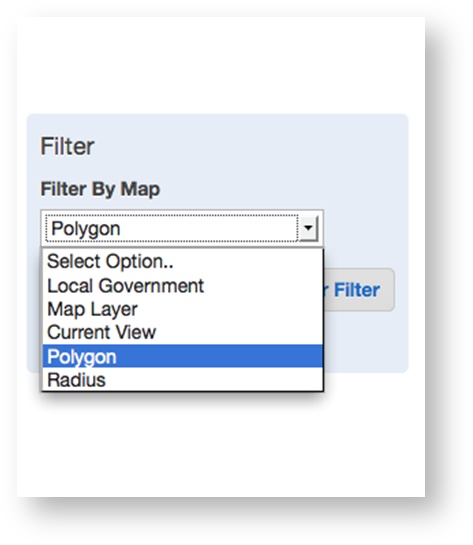
To set a filter
- Select your filter using the pulldown list

- Draw on the map
- Push the "Apply Filter" button
To reset the filter
- Push the "Clear Filter" button
For more details on the specific filters available, see the topics below.
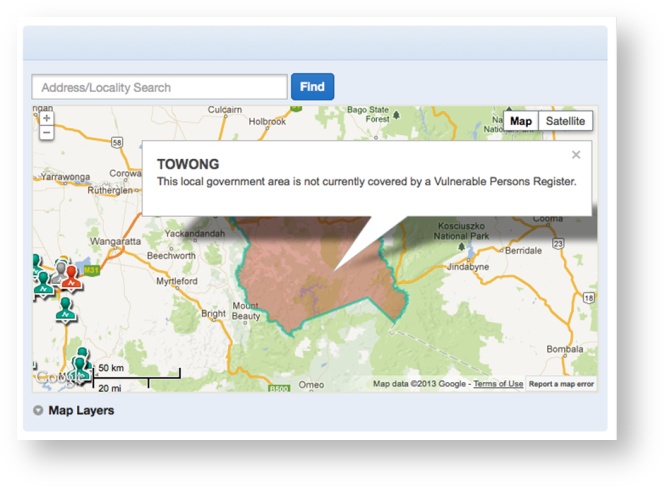
Identifying areas with no coverage
Areas shaded RED on the map indicate LGAs that do not participate in the Vulnerable Persons Registers.
Note that it is not possible to browse or filter for VPs within these areas. Records within this area may be accessed by contacting the council directly or using an external process/list.
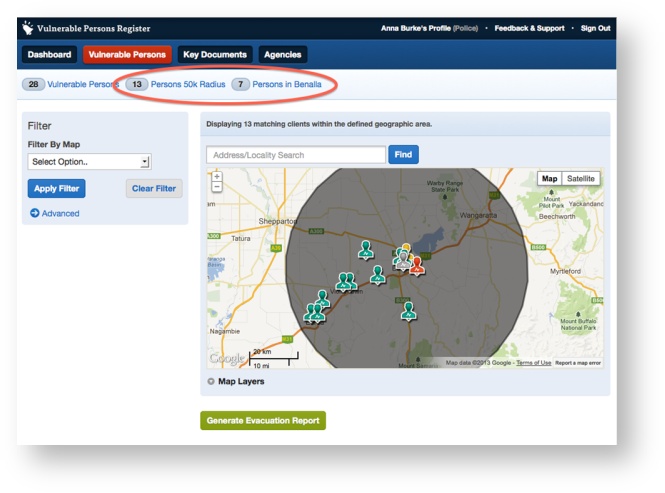
Counter Pre-set Filters
There are at least 2 counters which apply preset filters
- Vulnerable Persons counter - displays a total of all VPs in the Register
- 50k radius counter - displays a total of all VPs within 50 kilometres of your location
- Local LGA counter - displays a total of all VPs within your current area
To apply a pre-set filter using a counter, click the appropriate counter
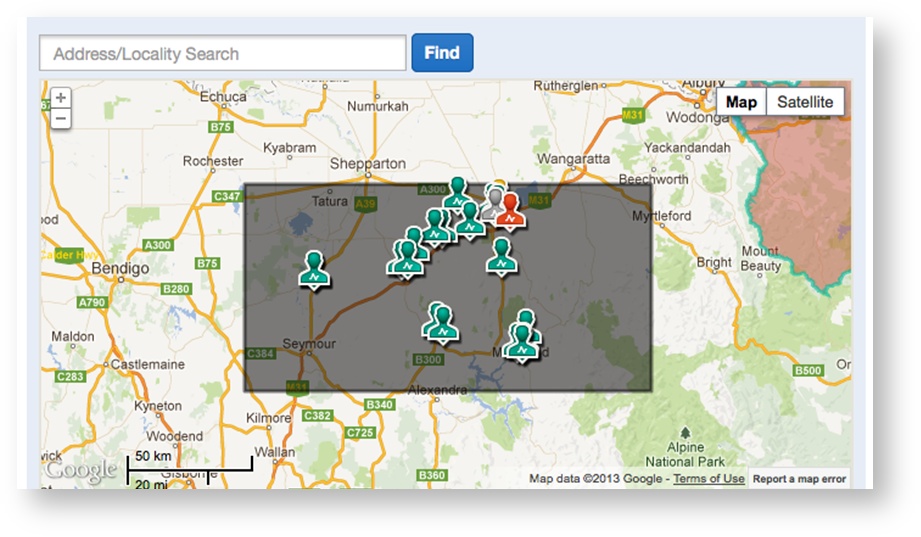
Current View Filter
The Current View filter will select all of the VPs within the map view window on your screen (ie rectangular geographical area).
- Browse to the area.
- Select the ‘Current View’ filter
- Push the 'Apply Filter' button
An example of a rectangular area selected from a current view is shown below
Radius Filter
A radius query allows you to select a group of VPs within a circular geographical area using a central point.
To select a radius to work with:
- Browse to the area.
- Select 'Radius’ from the pulldown list
- Click the map to place the centre point.
- Adjust the radius using the cursor
- Press the 'Apply Filter' button

Polygon filter
The Polygon tool allows you to select a group of VPs within an irregular area that you define.
The polygon is comprised of a group of lines connected together with the selected VPs lying in the area within them.
To create a Polygon filter:
- Browse to the area
- Select ‘Polygon’
- Click the map to draw the polygon each point is connected to the last by a line

- Close the polygon by clicking the first point.
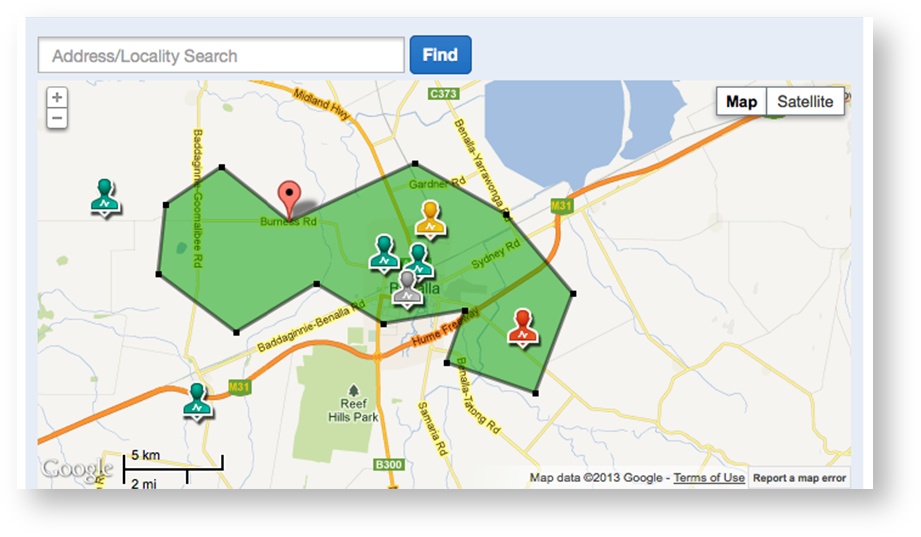
- Click 'Apply Filter'
Polygon from External Layer
The Polygon from External Layer tool enables you to filter with a complex area thas has previously been imported into the VPR from an external source. These are centrally managed and can be added to including live feeds from external sources (such as LGA boundaries, State Control Centre incident feeds).
Map Layers
External map layers can be found and viewed on the map
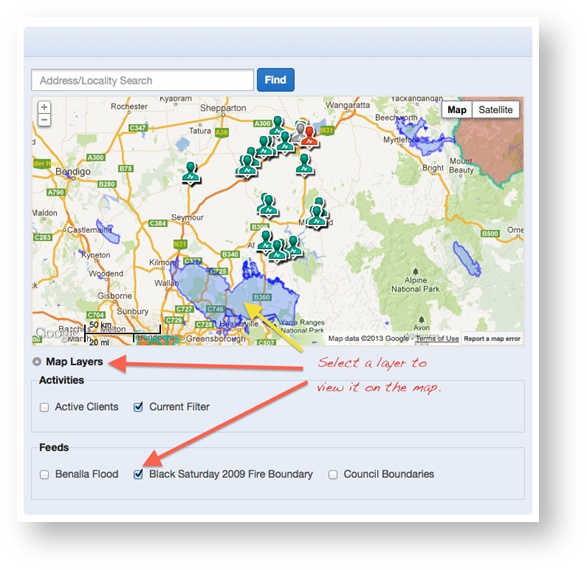
Applying the Filter
To apply an external layer filter:
- Select 'Map Layer' from the pulldown list
- Select the layer you want to use from the 'Layer' pulldown list.
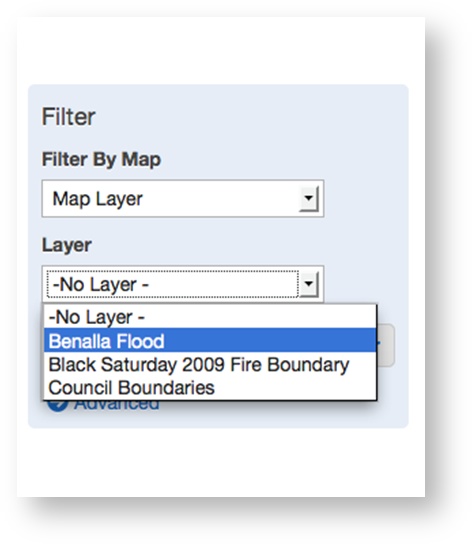
- Click 'Apply Filter'.
Evacuation Reports
Evacuation Reports show a list of all vulnerable clients, emergency contact details and special needs.
With the VPR, Evacuation Reports can be generated in a number of ways:
- Show on screen
- Download as a file - either PDF or CSV (Excel)
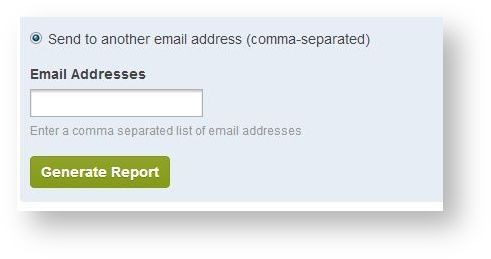
- Email a PDF - either to yourself, or to one or more external recipients
Report Contents
Evacuation Reports consist of the following core components:
| Component | On Screen (HTML) | CSV | |
| Cover Page | Y | Y | |
| Personal Listing | Y | Y | Y |
| Personal Detail | Y | Y | Y |
| End Page | Y |
The End page is left intentionally blank for a reference when printing.
Cover Page
Includes:
- The user’s details
- Date, time, IP address of query
- Filter criteria
- Result count
- Overview map

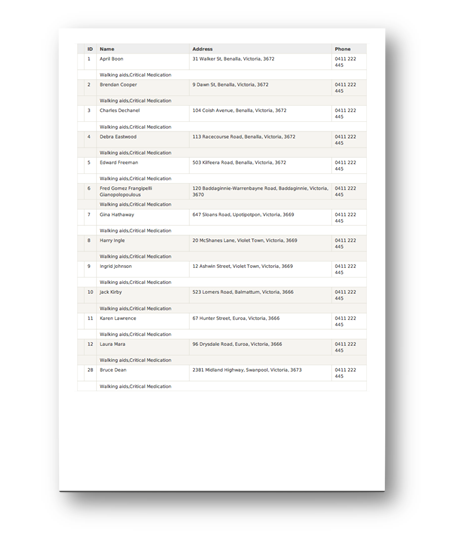
Person Listings
Includes a list of selected clients in a single table along with their:
- Name, Address & Phone
- Summary of evacuation criteria
- "Consult Health Commander" flag (highlighted in yellow) for clients with special evacuation needs
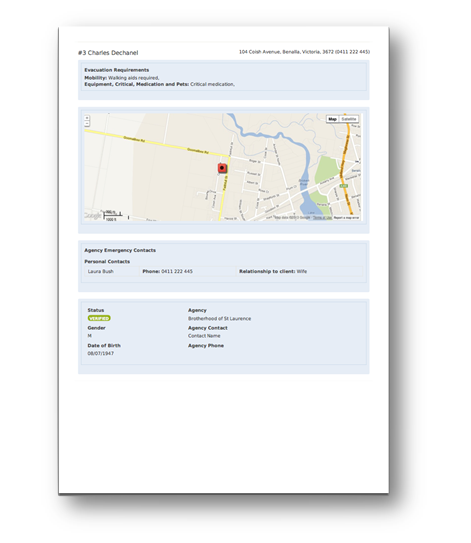
Person Details
Includes individual details for a client:
- Personal details
- Agency & Personal Emergency contacts
- Address (including marker on map)
- Record ID for matching between report pages
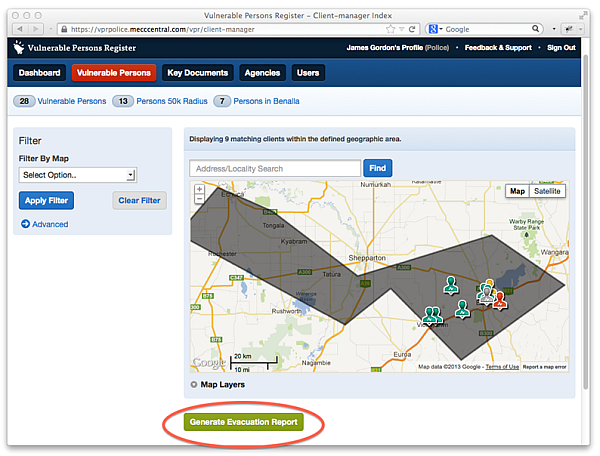
Generating an Evacuation Report
To generate an Evacuation Report:
- Apply a Filter
- Push the "Generate Evacuation Report" button
- Provide the purpose for which the report is to be used in the "Purpose of Report" field (this is mandatory and is required for audit purposes)
- Specify a report output type
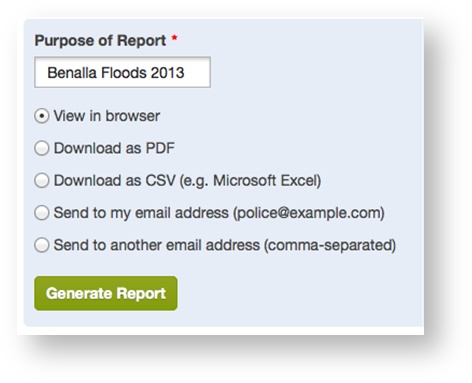
- Push the "Generate Report" button
On Screen Report
The On Screen report provides a view of the report in HTML format on-screen. Note that while maps appear embedded on the page, they are a static view and you cannot pan/zoom or change views.
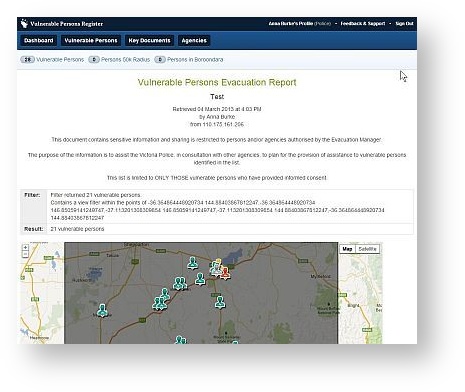
The On Screen (HTML) version has a print stylesheet optimised for printing that removes the menus and navigation (see below) however the PDF version is preferable for printing.

Print Preview of On Screen Evacuation Report
Downloadable Reports
For downloadable reports (such as PDF or CSV) use the pop-up dialog to save the report your computer and/or open.
The PDF format is better suited to printing and sharing;
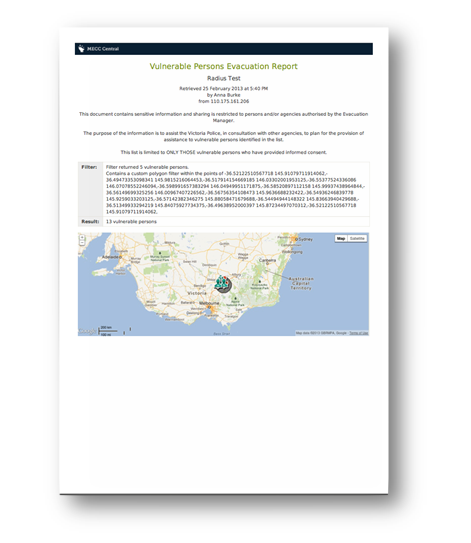
Sample PDF version of Evacuation Report
while CSV (see below) is suited to use with a spreadsheet program such as Excel.
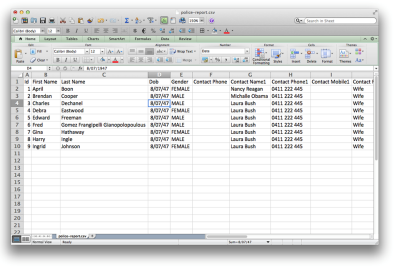
Sample Excel version of Evacuation Report
Emailing Reports
If you opt to send the report, it will attach a PDF of the report to a system generated email.
To send to other email addresses, you will need to select this option and enter a list in the field provided before pushing the "Generate button"